I was becoming more and more concerned about the direction that our country was going in when I got an invitation to visit Baja. I had airline miles accrued enough to get there and back and they were offering free accommodation, so I jumped at the chance.
I knew the couple inviting me and my daughter pretty well. The woman had been living in Baja near Cabo San Lucas – El Pescadero specifically – and she had been living there for years and working remotely for an American company. It seemed like it would be a good entrée into what living in Baja would be like. I thought, “Mayber Baja could be somewhere to escape to if things went south here.”
I met my daughter at the Phoenix airport. We would be flying to Baja together. We were going to have a good time, and this would be her first trip overseas to another country. We could all support her and she would be as safe as she could be. I had talked her out of flying to Bali to spend a couple weeks at a fruitarian retreat. Being in Bali by herself, never having been to a foreign country was a really bad idea in my estimation. All sorts of things could go wrong, and I would be thousands of miles away unable to help. Yes, going to Baja would be a good first step.
Myself, I hadn’t been out of the country for so very long. In years past I had been to India, Europe, Mexico, and Central America. I was really looking forward to something different.
And different is what we got.
We got on an almost empty American airlines flight. We figured most people had bailed because at the time mainland Mexico was suffering from cartel violence. Guadalajara especially was having a really rough time. We almost bailed ourselves but then we found out that Baja was safe being so far from the mainland – 300 miles, as a matter of fact, of open ocean separated the two as well as being at the tip of the very long Baja peninsula – makes it impractical for cartel activities. They just don’t bother. The mainland is easier pickens.
It was a treat to be on an almost empty plane. We flew above the Baja peninsula and the Sea of Cortez for a very long time, and we could see tiny boats in the water down there near the shore. The rugged desert landscape was fascinating as it always is when flying high above it. When we landed in Cabo and wended our way through the almost empty airport to the customs people, I went one way to one officer and Ari went to another. I tried out my rudimentary Spanish on the officer. “Buenos tardes, senor. Como estas? Muy bien, gracias. E tu?”
Then Ari headed toward me with a puzzled look on her face. “What happened?” I said. “He was so rude to me, mom.” she said. She in her flip flops looking every bit the young American, he asked her do you speak Spanish and she replied no and he said why not? Later we heard that sometimes the customs guys copped an attitude with young people because they judged them to be the rich Americans (which they usually were) coming to behave badly. Spring Break was right around the corner, so he made a mistake but not an unusual one. I didn’t get that attitude because I was obviously an elderly abuela (grandma).
We waited for our ride outside by the pickup zone. Below us in a courtyard loud music was playing and the scent of frying food was heavy on the air. I thought about how it was when I arrived in India so long ago where there was the same rowdy atmosphere. Off in the distance we saw surrounding houses, mountains and desert landscape. It was hot. It was dry hot. It was not uncomfortable. Across the road there was the Mexican version of 7-Eleven (OXXO) which looked pretty inviting.
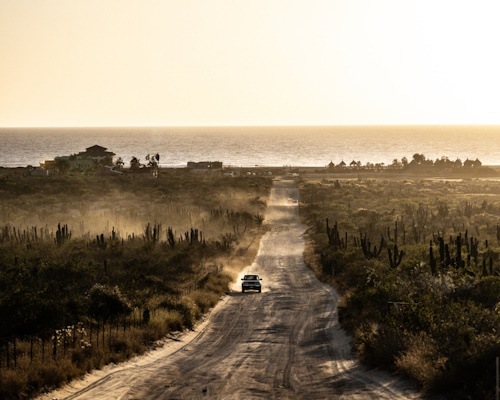
Emilio and Jessica arrived and then Patti came in on her separate flight from Oakland. We packed into the back seat of their Ford pickup and promptly headed to that OXXO for cold drinks. Then we set off down the highway. The airport was far from Cabo, and we drove through the hilly desert. The vegetation was different from southern Arizona Sonora desert but the same. Scrubby brush, gravelly dirt. There were giant cardons (Cardon Gigante) which resemble saguaro but make saguaro seem like baby brother and refined. The cardons are not only huge but also very rough and powerful looking. They loomed.
The drive to El Pescadero was nerve-wracking. Emilio was a good driver but no one else was. They drove all over the road and zoomed out to pass us and my seat belt didn’t work so I could just see us rolling in the ditch and losing our lives. Welcome to Mexico. There is no drivers ed in Mexico. You learn by doing. You learn well or you learn badly. You hope for the best and cross yourself every time you go out on the road. Mama mia!
We made it anyway by the grace of God. Highway 19 to El Pescadero is good. It’s similar to the Mexican Highway 1 to the east that goes all the way up into California after all. We could just keep driving and we would eventually arrive home. We couldn’t get lost.
When we got to El Pescadero all that changed when we got off the highway onto the neighborhood roads. OMG the worst roads in the world. We could only crawl and still our fillings were being jarred out of our heads. The roads were also cut deep into the sand, so the actual ground level was about 4 to 5 feet above the road surface. What was up there? Maybe farms? Pescadero is famous for mangoes.
The sandy unpaved road heads toward the ocean undulating like the ocean itself.
Emilio and Jessica’s house was a cute bungalow, and we settled in for the night but not until we had a fire going in the large yard area. Off in the distance you could hear the roar of the waves on the Pacific. We were in Mexico!
The next day I got down to some serious experience of real Mexico. When I go to a foreign country I prefer to never go to the tourist area if I can help it. I want to go off the beaten track to the real country where the paisan live. Yes, the tourists’ hotels are lovely – and expensive – and necessary if you would like to drink the water. Cancun comes to mind. They have water filtration. But anywhere else ask for agua minerale without ice and you’ll be okay. The ice is made with unfiltered water, don’t you know. Use a straw. Don’t sip right from the bottle’s mouth.
I rode into town with Emilo to the local grocery store which I pleasantly noticed had everything! I love foreign stores but especially foreign grocery stores. I don’t want to see what I see every day back home. So, they had everything – that was Mexican I mean. They had a meat counter with meat and cheese, and the rest of the store had bags and bags of beans and rice and tables and tables of vegetables. Even a large wall of personal items with Mexican shampoos and toothpaste. Everyone was friendly and definitely spoke Spanish. “Desculpa” or “perdon” (excuse me) when I wanted to pass by someone in the crowded aisle. I wanted to buy one of everything.
This is the nice part of El Pescadero where the ordinary Mexicans live.
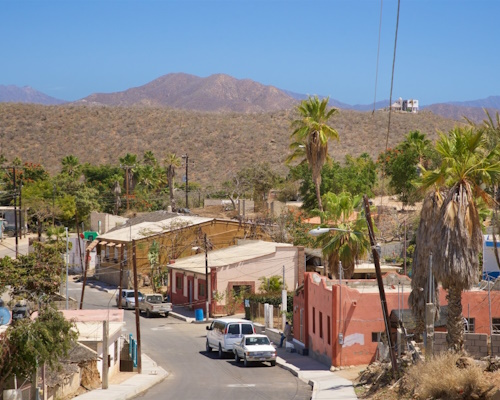
Emilio said would you like to see more of the village? Of course I said. It was the typical Mexican village. Chickens and dogs roaming the street. The dogs lay down in the middle of the road as you approach and look at you. Make my day. Just go around, amigo. They weren’t malnourished. Someone was obviously taking care of them.
There were lots of cinder block construction homes and many had plastic tarps for roofs. This would be a shock to most Americans. I thought it might be more improved over what I experienced the last time I was in Mexico (35 years ago) but it wasn’t. Could Americans live here? Maybe. They would have to be open minded Americans who spoke Spanish fluently. There’s no way your average American could ever fit in. And even then, they would have to live here for years. And I mean years!
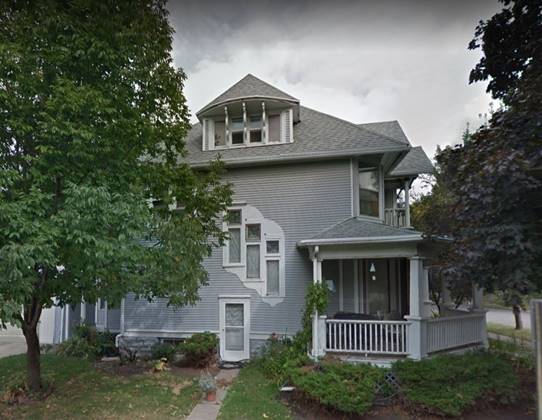
The ex-pat homes were so very different. The ex-pats lived in villas that were all very similar in size and style and all of them were on the ocean side of the highway. The Mexicans lived on the mountain side of the highway. It’s the same in Cabo San Lucas that you will see in a minute.
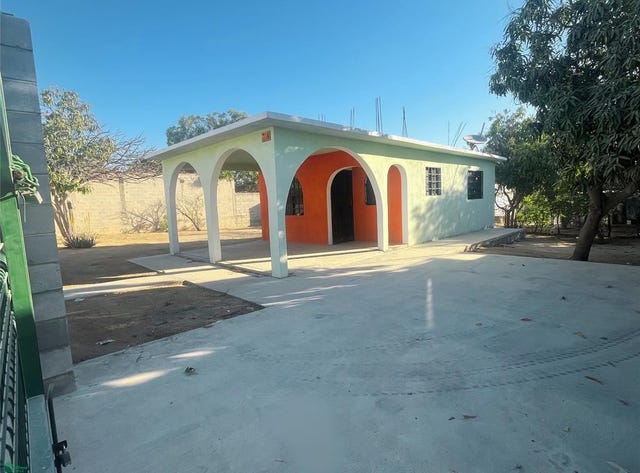
This is a $925,000 house, folks. Purty damn nice.
Here’s a casita one bedroom one bath for $178,000 that I could afford.
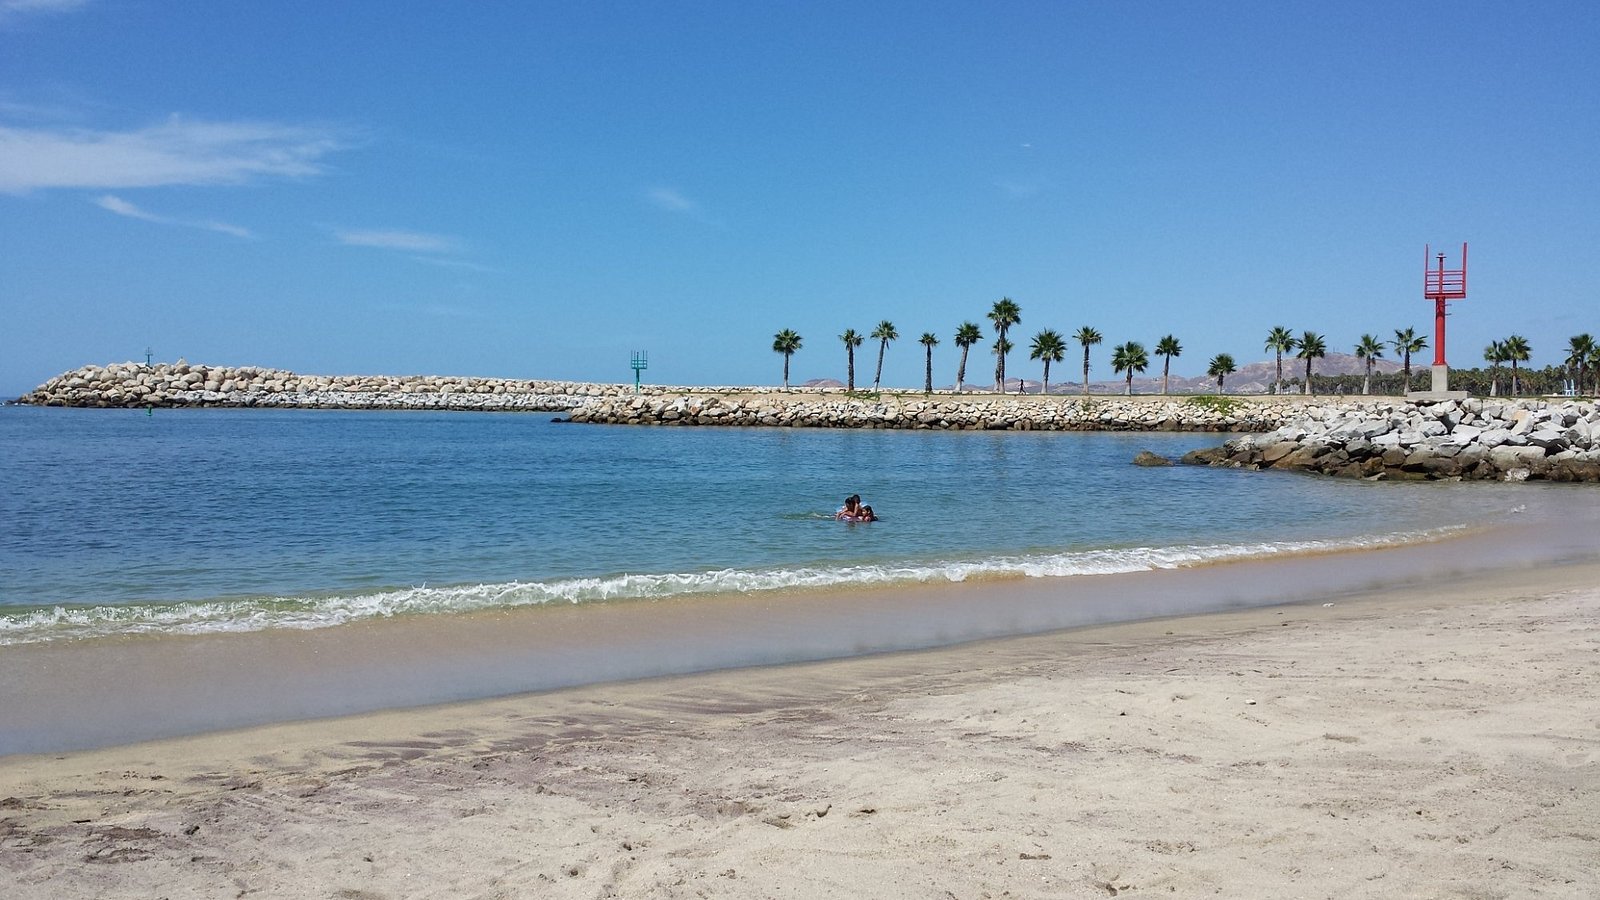
We went to Playitas Beach in the afternoon. The water was great and waves small. I’m not much of an ocean swimmer having been nearly drowned in Hawaiian surf and always wondering what Jaws is swimming around down there looking up at me hungrily. My imagination is too vivid, so I was content to wade in the shallows and sit on the nice sandy beach just relaxing.
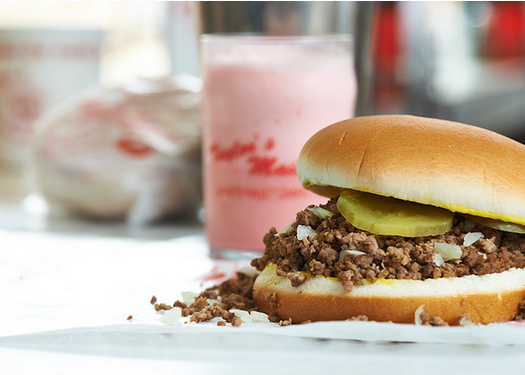
We made a lot of food at home. We had carne asada grilled by Emilio with habanero pepper salsa on the side that would take paint off a wall. Emilio also made my new favorite light dinner that he called enfrioladas. Black beans boiled until soft and blended to a sauce-like consistency poured over corn tortillas sprinkled with cilantro, queso fresca, sliced onions and shredded pollo asado. Emilio said this was a good meal for him when he lived in Mexico City growing up.
Our whale-watching trip was amazing as you can well imagine. After we got towed out into the water in a large dinghy and motored off nothing was happening, so we fished for Sierra Mackerel and caught a five or six. Then the whales surfaced and the 4 boats that had grouped separately but together powered over as fast as they could. The race was on! Who could get to where the whales were the fastest but stay a respectful distance away. There was a mom and her baby leaping out of the water. They leap out not because they are so tired of being underwater. They leap out and come crashing down to hopefully knock off some of the nasty barnacles that like to attach themselves. They were humpback whales.
When we came back in, the boat captain told us to hang on because the guy handling the outboard was going to gun it to get us and the boat up on the beach. No one was catapulted out and then Emilio took the fish we caught over to a station where a local guy cleaned them. Our intention was to take them into town and have a local restaurant make ceviche out of it. You can’t get any fresher! The place we went to was Shaka’s.
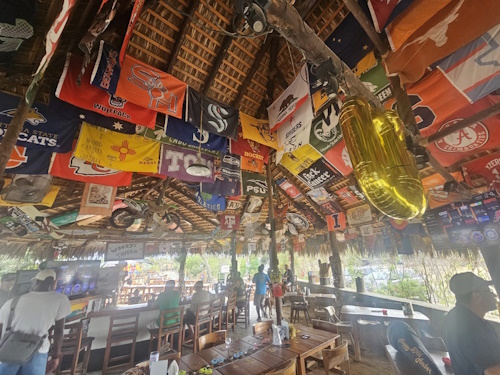
Shaka’s is outdoors under a large, vaulted roof.
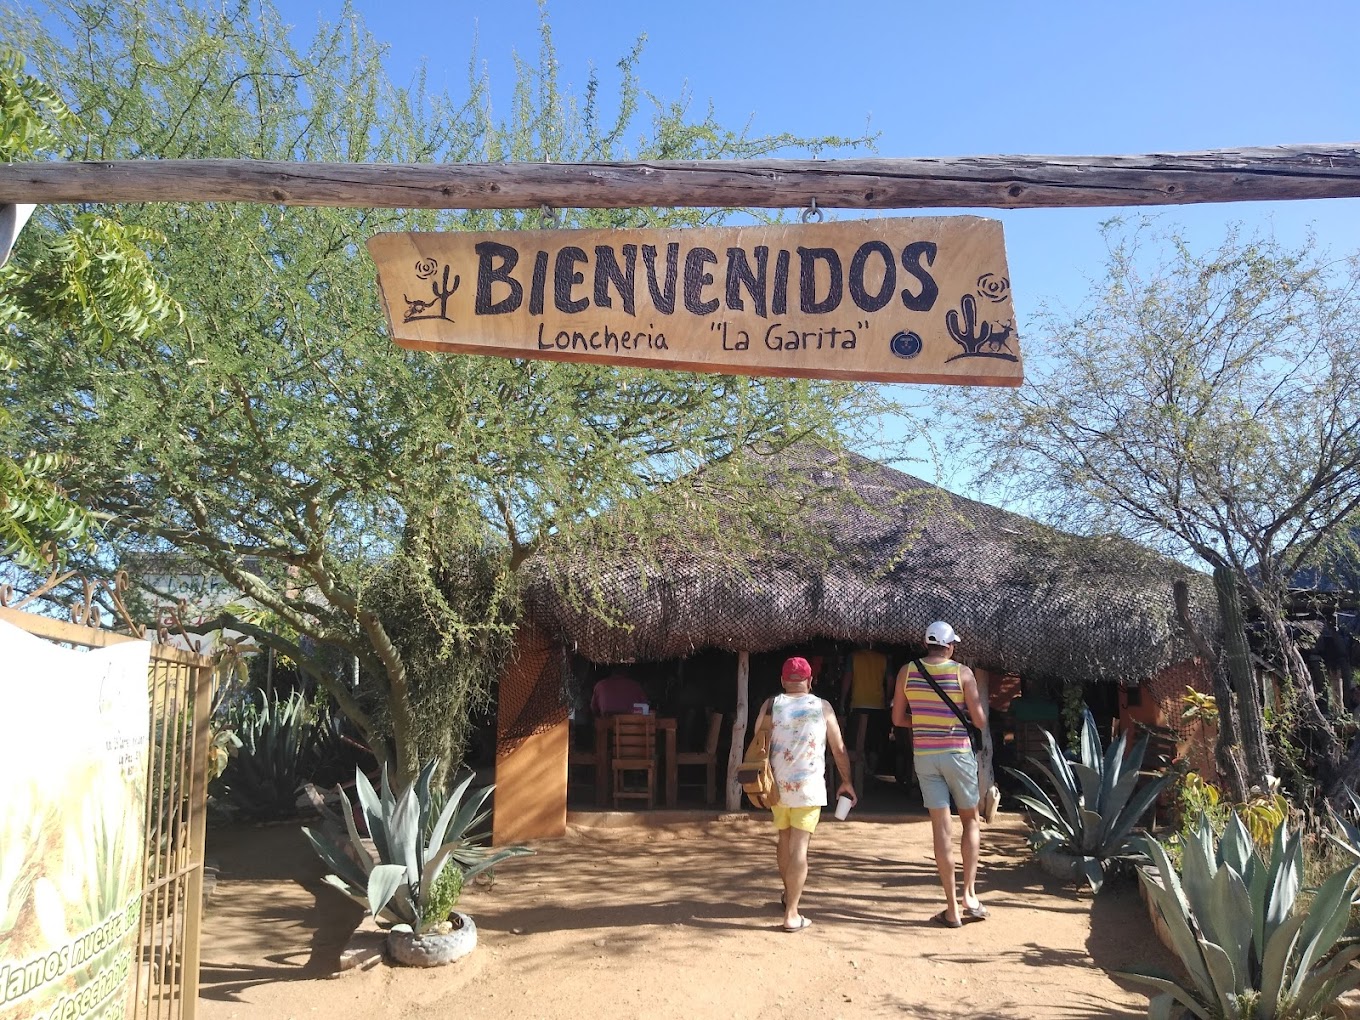
Everywhere we went the food was out of this world. Could you imagine it to be otherwise? In Baja the tortillas are made of corn, and they were so much better than you get in the States. Maybe because they are always fresh. In northern Sonora Mexico the tortillas are made of flour. I prefer the corn. They were so good they soured me on store bought tortillas that we get back home. I’m learning how to make my own fresh corn tortillas. Anyway, we ate and drank (smokey mescal), a margarita here and there. Fish, fish and more fresh fish. There were also the local restaurants Hierbabuena for garden-fresh Mexican dishes, Baja Beans Cafe for morning coffee and brunch, and Cocina de Campo by Agricole for upscale farm-to-table fare. These three are for the ex-pats. For the locals there is La Garitas del Chilpa up the road on Highway 19. We had Huevos con machaca (eggs and dried beef), and tacos con marlin (more fish).
La Garita welcomes you.
Tacos con marlin
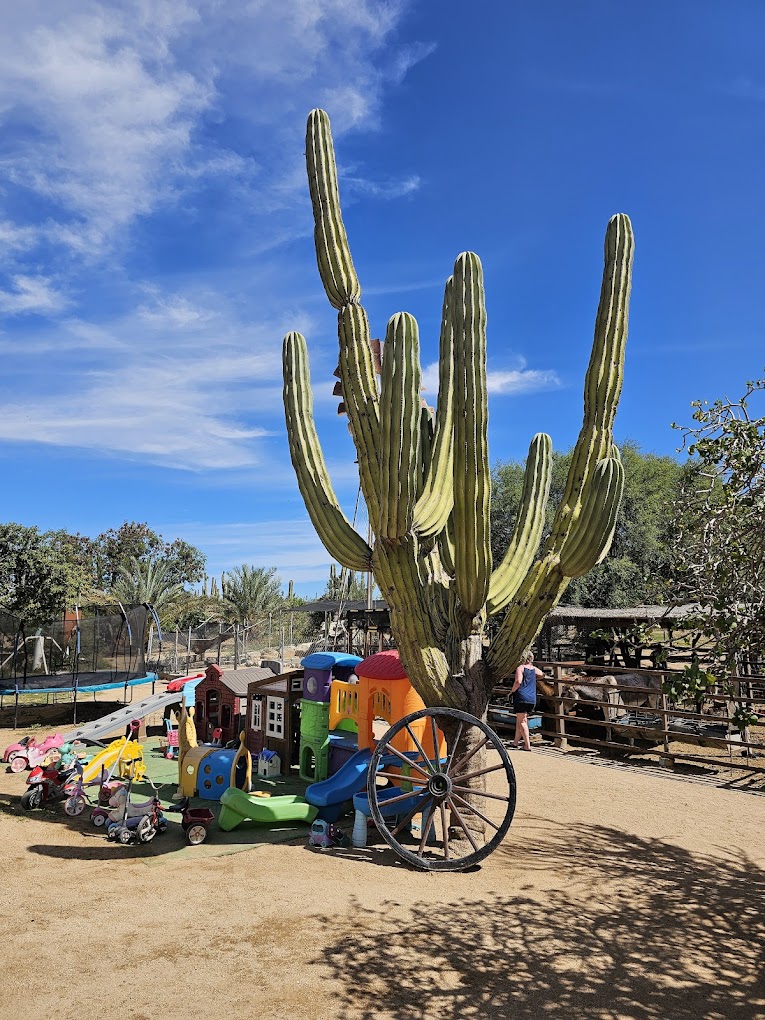
The giant cardon and pathetic petting zoo back behind La Garita
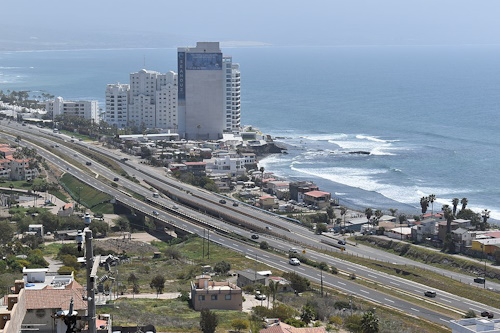
The only unpleasant part of Baja is Cabo San Lucas. The quaint fishing village of yesteryear is long, long gone. It’s now an ugly metropolis where the glitzy high-rise hotels line the beach and the slums are on the other side of the highway with the ubiquitous crappy roads. It’s conspicuous wealth juxtaposed with conspicuous poverty. It made me sad. Only San Jose Del Cabo retains any semblance of lovely old-fashioned Mexico.
I wish I could have seen Cabo when it was still a sleepy fishing village.
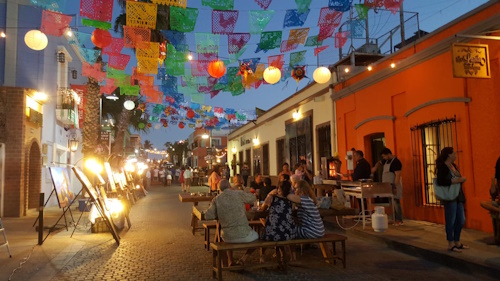
The San Jose Del Cabo Art Walk is wonderful. We had dinner here from an outdoor vendor. The corn on a stick (elote) slathered with mayo and parmesan sprinkled with Tajin.
So, could I live in Baja? No. I could not. I think it comes down to the realization that I am too old to make radical changes in my life. When I was young, yes. When I was young, I was ready for adventure of any kind as long as it wasn’t reckless. Now I like adventure but of the quiet kind and in places where I’m already somewhat familiar. It’s too bad and I hope our country doesn’t go down the toilet because I now have no realistic escape plan.
Here’s a piece of writing that I find particularly relevant.
“We are often called “the elderly,” but that quiet label hides a truth most people rarely pause to consider: we are the last living witnesses of a world that no longer exists.
If you look closely, you might notice gray hair, slower steps, or the quiet patience that time alone can teach. But if you truly listen to our stories, you will discover something far more extraordinary. We are not simply older people moving through the final chapters of life.
We are the survivors of one of the most breathtaking transformations in human history — a generation that walked from the slow, deliberate rhythm of an analog world into the dazzling speed of a digital one without ever losing our sense of humanity along the way.
Our journey began in a very different place.
Many of us were born in the 1940s, 1950s, and early 1960s, when the scars of World War II were still fresh across Europe and Asia and the world was slowly learning how to hope again. Cities rose from rubble. Families rebuilt lives after years of uncertainty. Childhood unfolded in ways that would feel almost unrecognizable to younger generations today.
Our toys were simple: marbles played in dusty yards, hopscotch drawn on cracked sidewalks, checkers and cards gathered around kitchen tables while the smell of dinner filled the house. When the streetlights flickered on in the evening, it was the universal signal that childhood adventures were over for the day and it was time to go home.
There were no smartphones, no streaming videos, no endless scroll of digital distractions. Instead, we built our memories in the real world — with scraped knees, laughter echoing down neighborhood streets, and friendships that formed face to face, without the mediation of screens.
Music became one of the defining soundtracks of our youth. The 1960s and 1970s arrived like a wave of color and rebellion. We watched culture shift around us, carried by electric guitars and voices that dared to question the world.
For many of us, gatherings like the legendary Woodstock Festival of 1969 symbolized something powerful: the belief that peace, music, and community could reshape the future. Hundreds of thousands of young people stood together in muddy fields, listening to artists who poured raw emotion into towering speakers known as the Wall of Sound. Those concerts were not merely entertainment; they were moments when strangers felt like a single generation singing the same hope under an open sky.
Education looked different then, too. Our notebooks were filled with handwritten notes carefully copied from chalkboards. Research required patience, long hours in libraries, and stacks of heavy books rather than a quick internet search. We learned to slow down and think through ideas because information did not arrive instantly. Mistakes were corrected with erasers and ink, not with the click of a delete button.
Love carried a different rhythm as well. We fell in love while vinyl records spun on turntables and cassette tapes clicked softly inside plastic players. Music became the background to first dances, long conversations, and dreams about the future. Those relationships grew into marriages, families, and lives built step by step through the 1980s and 1990s — decades that saw technology begin to reshape the world around us.
Yet nothing compares to the bridge our generation has crossed. We are the only generation to have experienced an entirely analog childhood and a fully digital adulthood.
We remember waiting days — or sometimes weeks — for handwritten letters to arrive in the mail. We remember rotary telephones and party lines where neighbors could accidentally overhear conversations. Communication required patience and anticipation. Today, we can see the face of a loved one across the ocean instantly on a screen small enough to fit in a pocket.
The world changed in ways few could have imagined. We watched humanity land on the Moon in 1969, a moment when millions of people sat in living rooms staring at black-and-white televisions as Neil Armstrong took humanity’s first steps on another world.
We saw the rise of personal computers, the birth of the internet, and eventually the arrival of smartphones that placed entire libraries of knowledge in our hands. Machines that once filled entire rooms now exist on devices lighter than a paperback book. We moved from punch cards and mechanical tools to artificial intelligence and global networks connecting billions of people instantly. And through every shift, we adapted.
Our bodies carry the marks of the times we lived through as well. We grew up during fears of polio and tuberculosis, illnesses that once terrified entire communities before vaccines helped bring them under control. We witnessed the global challenges of pandemics and health crises across decades, including the recent silence and uncertainty of COVID-19, which reminded the world that resilience is still required in every generation.
Science itself transformed before our eyes. We saw the discovery of the structure of DNA in 1953, the decoding of the human genome at the turn of the century, and the early steps into gene therapy and advanced medicine. Transportation evolved from simple bicycles and steam engines to hybrid vehicles and electric cars gliding almost silently through city streets.
Few generations have witnessed such sweeping change. And yet, despite everything that evolved around us, certain things remain unchanged. We still understand the joy of a cold glass bottle of lemonade on a hot afternoon. We still remember the taste of vegetables picked straight from a garden. We still know the value of a long conversation that unfolds slowly without a keyboard or screen interrupting it.
Our memories stretch across decades. We have celebrated births, mourned losses, watched friends depart, and carried their stories forward. Those of us who remain share something rare: the experience of standing at the crossroads of history, holding memories from a world that younger generations know only through photographs and stories.
But we are not relics. We are living bridges. Our perspective reminds the modern world that progress does not have to erase wisdom. The speed of technology does not have to replace patience, kindness, or reflection. We remember what life felt like before everything moved so fast — and that memory carries quiet lessons worth sharing.
So when someone calls us “elderly,” we can smile. Because behind that word lies something extraordinary. We are the generation that crossed two centuries, witnessed eight decades of transformation, and walked from the age of handwritten letters to the era of artificial intelligence.
What a life we have lived. What a remarkable story we continue to carry. And if you belong to this generation, take a moment today to look in the mirror and recognize something powerful.
You are not simply growing older. You are living history. You are part of a generation that will always remain one of a kind. And perhaps, in the quietest and most meaningful way, you are becoming legendary.”
I saw this article in the New York Times and I thought it was worth reposting. Just so ya know I changed a word to make it more right for me. I like the term “elder” instead of “elderly”. The author used the word “elderly”. I think the word “elder” is more dignified.
So, here it goes…
How to Be Old
By Roger Rosenblatt
This is a list of rules for elders, the aim of which is to keep us elders elder, and not to see us go one step further. Staying alive in one’s later years is an art generally requiring the avoidance of wrong moves. The key word to a lot of one’s behavior is “don’t.” If more elders simply did not do certain things, especially on impulse, the world would be a safer place. Duller but safer.
I should add that if you fail to follow these rules, I’m not saying that you are doing anything wrong. Only that you will suffer.
1. Runwhen you hear “We must do this again.”
This is often said at the end of some pointless social event in which you participated reluctantly. Inevitably someone will say cheerily, “We must do this again.” Nonsense. They don’t mean it. You don’t mean it. Nobody means it.
2. Marry above your station.
Usually you can’t help it. But you’ve probably found that out already. (Me: the only thing I see wrong with this is if everybody married above their station there would be no one left above your station. Someone’s going to get the shaft. So, think about that.)
3. Don’t forget to bestow confidence.
It’s the best thing you can give someone you love. Saying “You can do it” to a loved one in a situation in which that person has self-doubt — taking an exam, making a speech, writing a poem — means more than any sweet profession of affection. It means that you love that person so wholeheartedly that you wish him or her the inner satisfaction of self-realization. The pride of achieving themselves. What more can you say that so expresses your love?
4. Observe the moth.
In her essay “The Death of the Moth,” Virginia Woolf notices a moth in its death throes, batting about a small windowpane. The author watches the animal’s plight with pity and admiration — awe, really. Its struggles are beautiful. She imagines the moth saying death was too strong, even for it.
Observe the moth in its monumental fight for life and do likewise. We gain life’s powers by knowing that eventually they will be taken away. There is beauty in this struggle.
5. Don’t share despair.
Not even with your friends. Not that they won’t sympathize. It’s just too much to ask of someone dear to you to bear your burdens.
6. Don’t compromise, especially a little.
Unless you’re a professional negotiator, don’t compromise. Give in a little, you might as well give up the ship. During the McCarthy era, students were required to submit loyalty oaths to maintain their scholarships. At a meeting of the Harvard faculty, a professor who had escaped Mussolini’s Italy challenged the dean on this matter. The dean responded that signing and sending in the oaths was merely pro forma and had no more meaning than licking the stamps on the letters. The Italian professor stood and said something like, “Mr. Dean, I’m from fascist Italy, and in fascist Italy you learn one thing. First, you lick the stamps. Then you lick something else.”
7. Screw it up royally.
You’ve spent a long life telling yourself that mistakes are to be avoided, but that isn’t necessarily so. Playing jazz piano, whenever you make a mistake, which is inevitable, you make another mistake deliberately to make something right out of something wrong. Then you do it again. Theoretically, you could play an entire tune of mistakes, and it would sound just fine.
You may think it would be better not to make the mistake in the first place. But a creative mistake may be truer to life, as you’ve no doubt discovered. You took a job you didn’t want, soon to discover it’s the ideal job for you. You were born to do that job. When you think of it, life is an assembly of creative mistakes. Even when you don’t think of it.
8. Don’t question everything you don’t understand.
The older you get, the more wonderful the world appears. Wonderful meaning full of wonders. The sudden appearance of something beautiful in the midst of heartbreak, for instance.
You are at a low point, and you think you’re going to stay there, there’s no relief, when out of the blue, something by Mahler or Beethoven comes into your air, and all at once the sorrow dissipates. You don’t question or analyze the moment. You’re simply grateful for it.
Where heartbreak is, beauty intrudes. Wondrously.
9. Grab the chicken leg.
So, there we were, in our 20s, Ginny and I and a bunch of friends, having a picnic by the Charles River in Cambridge, when I picked up a chicken leg with the intention of eating it and held it aloft. A little boy walked by and took it from my hand and kept walking. My friends and I laughed — the boy was so casual. Ginny said, “He must think that life is a chicken leg, waiting to be snatched.” In fact, it is, even when you’re no longer a spring chicken.
10. Look only at the rim.
When I was playing intramural basketball in college, I was 5-foot-11, a mite in the land of giants, and my all-around game was so-so at best. Yet most of the time I managed to score in the double digits by paying no attention to the defense. I simply pretended it wasn’t there. I looked only at the rim of the basket. And sure enough, most of the time the defense didn’t touch me.
Other games in life offer similar opportunities, at any age. Disregard the impediments to your well-being — a noisy neighbor, a treacherous colleague — and concentrate instead on where you are headed. You’ll be pleasantly surprised how easily you get there. Nothing but net.
11. Do not seek immortality.
It won’t come to you anyway, certainly not through your works and achievements. But the good feeling you have for others, and they for you, that goes on forever. I’m fond of quoting the poet Philip Larkin: “What will survive of us is love.” That should do it.
What can I say about high school? For some people it’s the best time of their lives to be looked back on in future times with great longing. For others it’s an extension of that twilight zone that is junior high where adjustment to life escapes you and you’re mired in confusion. Which one was it for you? For me it was a combination of both.
In high school I felt like an adult for all intents and purposes. I could now drive a car. I had a choice to make about fooling around with my boyfriend and risk getting in trouble (and have to figure out how to go to Colorado to get an abortion or get married or have the kid and give it up for adoption). Yes, I could get married if I wanted to. Just like “adults” I could have children. Mom got me a bank account. Some people I knew went into business for themselves. It wasn’t all that hard to get emancipated and then live on your own. If guys were 18 in their senior year they could get drafted or sign up for the armed forces. In high school we were adults in many ways. But in other ways, we still had a long way to go.
Just like elementary school and junior high there was no line of demarcation between junior high and high school. You were out of junior high, had the summer off, and then next thing you know you’re in high school and expected to behave like a quasi-adult.
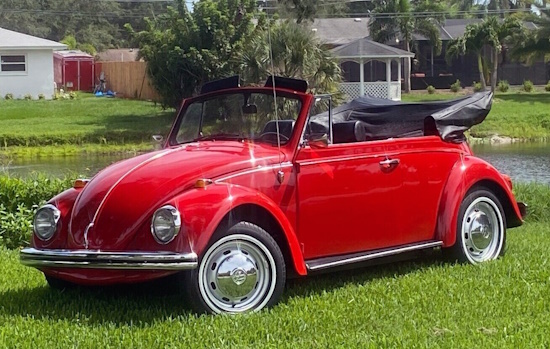
Artie refurbished a Volkswagen convertible Beetle which he painted cherry red and gave to me to drive. It was my pride and joy. He showed me how to drive it, and I stripped the gears before getting good at driving it. When I was finally good then my friends and I went crazy scooping the loop every Friday and Saturday night. I’d get behind the wheel and Christine, Kathy and Tani would pile in, and we’d drive down Main Street and South Third Avenue from the Times Republican newspaper building to the A&W root beer stand, turn around and do it all over again. We heckled our friends as they drove by and sometimes, we’d throw stuff at them like the canned figs that Christine stole from her candy striping job at the hospital.
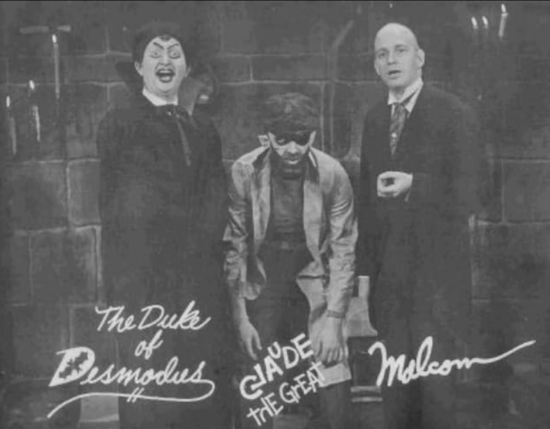
Eventually we’d make it over to Christine’s mom’s house to watch Gravesend Manor which showed scary movies like Masque of the Red Death and The Tingler until it was time to go home. It was corny as all get out, but we loved it. Malcom the Butler, The Duke of Desmodus, Claude the Great, Clyde, and Esmarelda. Ah, the days of corn and roses.
We would have slumber parties at someone’s house. To call them slumber parties was a complete misnomer because the point was to get as little sleep as possible. Once we had a big slumber party at Maribeth’s house. First, we drove all over town and did the usual scoop the loop. While driving we played the radio in the car. They were playing Chug-a-Lug by Roger Miller when we stopped off at the root beer stand and we turned the car off while we sat there waiting for our food. Then ate the food, and got going again. When we turned the car back on Chug-a-Lug was still playing! That’s weird! We decided to try an experiment. We decided to turn off the radio and then in a while turn it back on and see what happened. A half hour later… Chug-a-Lug! Now we were getting a bit paranoid. We drove over to Maribeth’s house, got out of the car, went upstairs to her bedroom and turned on the radio. Chug-a-Lug! We freaked out and imagined all sorts of conspiracies. There disk jockey must have really liked that song. We didn’t consider that.
During these slumber parties we got up to all sorts of shenanigans. One of our favorite idiocies was making each other pass out. Pass out? You guys think this is fun? How you did it was one person would breathe hard, in and out, in and out, in and out, for a minute and then someone would grab them around the abdomen and hold. If all went well the breather would pass out. Yeah, we thought this was fun! Of course, the “evening,” because by now it would be 1 or 2 in the morning, would end with all of us in our sleeping bags on the floor telling ghost stories. “I am the viper and I’m on the first step, I’m the viper and I’m on the second step, I’m the viper (all the way to the top landing). Anybody vant their vindows viped?”
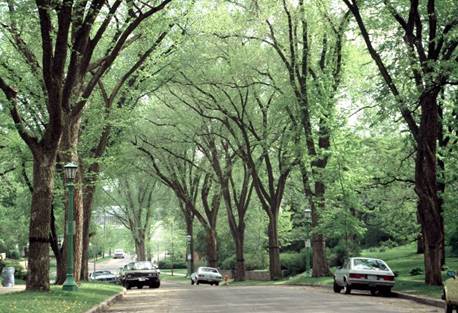
Someone told me that people thought I was aloof but that was really me being shy. I had to learn to be outgoing. Mom’s idea was that we weren’t the crème de la crème of Marshalltown society. She was always talking about someone doing this and someone doing that and that we weren’t a part of that social strata. Instead, we were artsy working class living in a very modest part of town. No two-story houses on wide tree lined streets. Just dinky little houses close together and small trees. Other families had better incomes and bigger houses in the nicer parts of town, so I grew up thinking I was deficient in some way. I don’t blame Mom. She was only being how she was raised and had never overcome that upbringing. She had an inferiority complex and overcame it by being outgoing. It took years but eventually I learned that being outgoing was the way to compensate. Kind of how a short boy becomes the class clown.
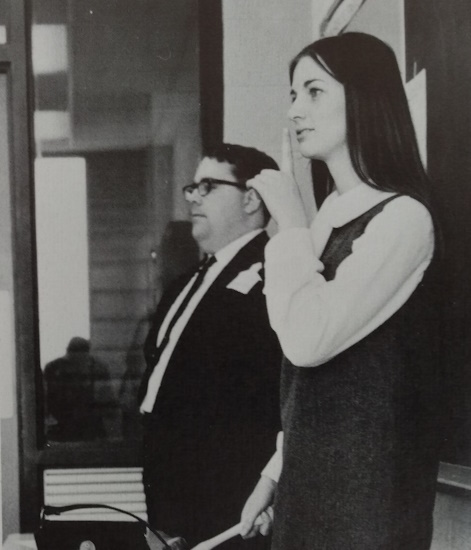
Still, I wanted to be popular and have people like me. The only way I knew how to do this was to join clubs. So, I joined the drama and art club and eventually became president of both. See? It was working! I got parts in a couple scripted plays and then was a cast member in the improvisational theater group that our drama teacher Stan Doerr directed. He called our troupe Gli Capriccioso (The Capricious Ones) after the style of Italian Commedia d’elle Arte theater from the 16th and 17th century in Europe. Pretty sophisticated for a podunk midwestern town, huh?
Stan Doerr was a wonderful drama teacher.
What a character Stan was! He had the most expressive face and was not shy even though he was pretty darn fat and in any other world would have been the target of bullies. He made it a blast to be part of the troupe. He would yell and fume and the actors and stage crew would cower but eventually it would all turn right in the end, and he let us know that we had done well. In the Commedia d’elle Arte I was cast in the part of Isabella, a female innamorata, and we made masks out of rubber to be as authentically Italian as we could be and then we dressed in half assed homemade period costumes.
With Gli there was no script. Just a scenario which was a basic plot line and we had to make up our own lines as we went along like they do in improv theater. We used slapstick Italian stories for the scenarios, and if anybody had any ambition this might have been an entrée into theater groups like Second City in Chicago that nurtured people like Chevy Chase, Gilda Radnor and Gene Wilder. I got a big laugh when another player was doing something inappropriate and I yelled out, “Cool it!”
In another scene Ralph, playing the part of Pantalone, a greedy old man and a lecher for young ladies, was to give me, as Isabella, a big comedic wet one right on the mouth. The comedic part was trying to negotiate the giant noses of our masks. But when Ralph finally made it to me, he opened his mouth wide, wide open and I, having never been properly kissed, had no clue how to kiss back. I didn’t fall in, but I didn’t enjoy myself either. Yuck, Ralph!
Doing all this worked because I then got dates from boys that would have otherwise been out of my so-called league. But there was still prejudice and peer pressure. Here’s an example: I went on a date with a boy that I had a big crush on. I thought he was edgy and a hipster, a renegade, a bad boy and I was excited by that. He was reading Walden by Henry David Thoreau and he was one of the popular kids. He came to our house, and I got in his car, and then he took me to a party where there were a lot of older kids, and some were making out. These were the kids that were in a rush to grow up, and I was trailing them by many lengths. Not knowing what to do, I sat on the couch with him and felt extremely out of place and uncomfortable. This went on for a while, and I guess he got bored because it was clear that nothing was going to happen with me so finally, he took me home.
When we got in front of our house, we parked at the curb and all of a sudden and without warning Mom turned all the porch lights on as if they were searchlights looking for prison escapees. You could almost hear sirens. I got out of the car and hurried to the front door. Not even so much as a good night kiss. I was so embarrassed and mad at Mom. I felt she ruined it for me, but truth be told I had probably already ruined it for myself by not putting out at the party. The search lights from the porch didn’t help, even so, in my mind. The next day a girl from the popular crowd came up to me and ordered me to not date him anymore because “you’re not in the popular crowd.” I was humiliated and he never asked me out again. I thought it was true, and it made me sad.
So, there I was. Sixteen and never been (really) kissed. This had to be corrected, and I was going to make it happen because I was not going to be that old stereotype. Since brothers seemed to be in good supply, I picked one of my classmate’s brothers. We went on a date and when he escorted me to the back door of our house, I let him kiss me. The kiss did absolutely nothing for me. Dang! Kind of soft and mushy and not exciting whatsoever. It did not inspire the fires of passion, but mission accomplished. Now I could relax.
Eventually I managed to snag a guy who Mom considered one of the elites. He was the son of a prominent doctor, and he had a couple cars that he would drive me around in; an old black model T and a little red convertible MG. I can still smell the scent of that MG. Anyway, I thought, “Oh boy! Maybe there’s hope for me yet.” On top of that he was a good kisser! However, this relationship was not destined to go anywhere. I did not want to get married and do what many people planned to do. I wanted to see the world. I had gotten a taste of what the world might offer beyond the confines of little old Marshallberg. I craved more.
Eventually that boy went off to college and by that time I had taken up with another boy who was an artist and a musician. This guy expanded my world and that was part of the reason I was drawn to him. He was a year older than me and on the day I graduated I remember waiting for Mom in front of the school and here he came out the front door walking straight toward me. As he passed, he said loudly, “You are the prettiest girl I’ve ever seen.” OK! I thought. That’s what I’m talking about.
I was surprised by what he said to me because back then the role models we had were actresses like Sandra Dee in Gidget Goes Hawaiian. Blonde and perky with button noses. My nose wasn’t cute and perky, and my hair wasn’t blonde. My nose had a bump in the middle. Mom called it “aquiline” whatever that meant (a long nose with a bridge). I also wasn’t the cheerleader type, and my chest was flat as a pancake. I was in a training bra clear into high school.
Having unusual clothes was one way to express my individuality. I liked to sew even though I was not good at it and I could not find the styles in Marshalltown that I saw in magazines and in the movies, so I made my own clothes. Mom was a snappy dresser in her younger days, and her clothes were elegant and tasteful, so she encouraged me that way. Vogue magazine inspired me but mostly movies like Tom Jones and Doctor Zhivago. I liked fashions from Great Britain, Jean Shrimpton, Twiggy, and the Beatles. I liked the long straight hair with heavy bangs, like the actress Jane Asher had.
Up until that time we wore the ridiculous ratted bouffant with the flip ends and bow placed smack dab in the middle at the part between the bangs and the bouffant. I’m so glad that fad passed. The long straight hair looked good on me but the bouffant did not. In vain I tried to make my hair do a ratted bouffant. I could never get my flip to come out even. One side always sagged lower than the other. (I’m feeling like a character from Bridget Jones Diary as I write this.) Such a disaster. To achieve this look, we wore curlers to bed. The curlers made sleep impossible because the plastic teeth jabbed into your head. I remember Mom telling me that all this discomfort was necessary. She said, “You have to suffer to be beautiful.” OK, Mom, sign me up.
After the bouffant deflated (yahoo!) and was replaced by British styles, straight hair ruled. Once Marjorie and I decided we needed our hair to be straighter than nature had given us. (mine was a bit wavy.) We put an iron on a low setting, draped our hair over the ironing board and ironed so it would be stick straight. I heard of some girls accidentally burning their hair this way, but we were careful, and it worked!
After I was invited to the prom I saw a picture of Mia Farrow in Look magazine in what I thought was the most beautiful gown. I decided that I had to have it. I begged Mom to make it for me, and she agreed. Mia’s dress was a black and white striped voile, and it was stunning. We looked and looked around Marshalltown and couldn’t find anything even remotely like it.
But Mom was undeterred, so we drove to Des Moines to a fabric store, where we still could not find the exact fabric. What a disappointment! So, we compromised and made it with a blue watercolor kind of floral voile. Not really sophisticated, dag nab it, but it turned out fine because Mom did a great job. When we danced at the prom my date held me by the forearm instead of my hand and we sat around the tables being uncomfortable. We were working on the night moves and no one told us how to do it.
I assisted Artie in making the life-size players cut outs in the background.
I was not a sporty girl but one thing that stood out was basketball. We had talented players and a great coach in George Funk. Going to the Bobcat games in the new auditorium was thrilling, tantamount to being in Madison Square Garden. The place would be packed to the rafters and the cheerleaders would come out and bounce around doing splits and waving their pom poms and then the team would enter the auditorium by plunging through a paper-covered hoop with a Bobcat painted on it. The energy was palpable, and we yelled our heads off. “Whomp the hobbum, Beat the shobbum, whee whee whee.” Marshalltown was so good that we won the boys’ state basketball tournament 10 times. Pretty soon the tourney was dubbed “the Marshalltown Invitational.” Once a year you were guaranteed to be able to skip school and head to Vets Auditorium in Des Moines for the games.
There was the pep band, led by Jerry Ellingson, and they would fire through classics like “Sweet Georgia Brown“ but once the ‘Cats came around the corner to take the floor Ellingson would cut off the band, and they would immediately launch into the MHS Fight Song. It always seemed like Coach Funk would come through the crowd right at the point where the band circled around and started the song for round 2.
An excerpt from Just Walk Away – a memoir of growing up in Iowa
In Junior High everything changed. I went from a largely contented child to a mostly discontented child. How could this happen? There was no particular line of demarcation between 6th grade and 7th grade and yet there it was. A journey into the Twilight Zone and no choosing. One day you’re fine, the next day you’re not. What is it about junior high? All the experts say it’s the hormonal changes. Is that it? One thing that I‘m sure of – it’s something that must be gotten through. There’s no way to navigate around it.
I walk down the street arms laden with books to the corner to catch a bus packed with kids. Mom has given me a scrambled egg sandwich that I’m supposed to eat but as soon as I get out of sight of the house, I throw it in the gutter. So embarrassing! And speaking of embarrassing, I’m on the bus and not sure how to act or what to say. I’m the tallest girl except for Judy so that makes me feel weird . There’s a boy who gets on at some point and I’m hoping he’ll notice me, but he never does. I’m too shy to say anything or initiate anything. Oh, well. Better luck next lifetime.
To compensate I spend most of my time studying and trying to get good grades even though what I really want to do is go all googley eyes over the Hildebrand Twins (who are doubly handsome but total greasers), go to Beatles movies, and pass notes to my friends during class. At Anson Junior High we wait outside the front door for school to start and tease each other without mercy. We are stupid little brats, and I have no idea who started it. It doesn’t matter because whoever started it the rest of us jump on board and participate without a second thought. Mean Girls. Eventually someone complains and who can blame them? Then we are called into the principal’s office and properly chastised and after that we never do it again. I am mortified at myself because my nature is not to be a bully. I am a dumb follower.
In the classrooms we pay just enough attention to get by and spend the rest of the time drawing elaborate cartoon stories that Christine and I make up about the exploits of the Beatles who are, of course, our favorite band. No, favorite EVERYthing. We see them on the Ed Sullivan Show and are over the moon from then on. I play all the 45 rpm records I can get my hands on and memorize all the lyrics and sing along. I can’t wait to go to the record store to see if any albums have come in.
We have all the fan magazines. We have all the records. We fanaticize about getting to see them in person and become their girlfriends. We get away with writing notes to each other because it looks like we were taking notes on what the teacher is saying, but we aren’t. This is 1962 and 1963. We are 12 and 13 years old. The notes are very funny and full of pictures and balloon dialogue. When the first Beatles movie comes out, we all troop down to the Orpheum Theater on Main Street on a Saturday to watch as many showings as they let us. I think I might have gone to see A Hard Day’s Night about 10 times. Same with Help!
I like Latin class, oddly enough, because the teacher, Rose Sadoff, is such a character and so very entertaining. Every class she declares, “Latin is not a dead language!” in her quirky voice and then she goes on to demonstrate how it isn’t by citing examples of how Latin is alive and well in many of the words we say every day. From her I get a love of language and later on I’m still enamored (Ha! Latin there!) and I study the etymology of words in a teeny tiny version of the Oxford English Dictionary. I memorize the Latin verb conjugations Mis Sadoff gives us. Amo, amas, amat, amare; amamus, amatis, amant, amare, “o”, I; es “you”; t “he”; mus “we”; tis “you”; ent “they”; amare! This is cleverly set to the tune of One little, two little, three little Indians. She also has us greet each other, “Salve!” (sal-vay) to which we respond, “Salve et tu quoque!” (sal-vay et too qwo-kway). “Salutations!” “Salutations to you also!”
I take Home Ec, because it’s better than the other classes, but I’m no good at it. The recipes they give us are really stupid. How about a Purple Cow, anyone? (Grape juice in milk). Are you kidding me? I am interested in cooking but have no natural talent. In science class Mr. Horgan has us demonstrate a project. Ellen makes a salad and tells us to tear the lettuce and not cut it with a knife because the cut edges will get brown.
I try sewing. The assigned projects are supposed to be simple and easy. Ha! Not simple enough for me apparently. I cannot get it. I’m always putting the wrong sides together, sewing them and then having to rip it out and do it all over again. I’m an impatient person and I want to just get on with it and not be a stickler for details. Please, Mrs. Teacher, don’t examine my work. Please don’t notice that the hem is uneven, and the buttonholes are raggedy. I get by and at least what I make doesn’t fall off me onto the floor.
I’m excited to join 4H where I will learn more cooking, but still on a beginner level. I am picked to demonstrate how to make an egg salad sandwich boat at the county fair. I get up on the tiny stage and show the judges what to do while they watch me with concentration and no sympathy. So, I pretty much ignore them, pretending they are not there, and go about my business. Chop hard cooked eggs, mix with mayo, scoop into a hollowed out hot dog bun and top the whole she-bang with a little sail made out of paper and a toothpick! Quelle drole! Remember this is the 60s. It’s an era full of Mad Men type ladies dressed to the nines just to vacuum the house a la Mrs. Cleaver. TV dinners are all the rage. Frou-frou food items are welcomed. I have absolutely no recollection of what the judges thought of my presentation. I’ve blocked it out. I am just glad to get it over with. Anyway…
It’s Artie who really teaches me to cook. Artie comes into the kitchen where I’m doing my homework at the table. He has an Italian cookbook, which he hands to me and says, “Pick out a recipe. We’ll go to Bacino’s market, and I’ll buy the ingredients. You make it.” So, I look in the cookbook and pick out Spaghetti Bolognese. It looks easy enough so I think I can do it. It has bacon, hamburger, and Italian sausage in it and it turns out really good. Now I’m hooked on cooking.
In junior high there’s a swimming pool in the lower level. We go into the dressing room and get on these horrible blue flimsy tank swimming suits and go to the pool to get lessons from Miss Hasenwinkle (how do Midwestern teachers wind up with such flaming terrible names? We also have Miss Houdyshell who teaches Mathematics). Some of us have our periods and this is an automatic excuse not to participate. We had gotten The Movie in the 6th grade (Very Personally Yours) which was incredibly embarrassing. In junior high some girls have figured out how to use tampons but most of us wear the belt and the giant Modess pad which we were sure is visible to everyone. More junior high misery.
I almost drown in one of our swimming sessions. We are told to swim the length of the pool and back and maybe I haven’t had enough sleep or I’m hypoglycemic (because I wouldn’t eat the egg sandwich) but at some point, I just cannot make it to the edge of the pool. Back and forth back and forth and then my energy just gives out, and I’m going under. I struggle but nobody notices until Ellen sees and jumps in to pull me to the edge.
A sociopathic boy in home room catches flies and tears their wings off so he can watch them crawl around the desk suffering. I am grossed out and disgusted. Does he go on to become a serial killer or wife beater? I’ll never know and don’t want to know.
I look forward to the school dances but I hate them at the same time. I get all dressed up in what I think is a cool empire waist dress. Then I stand at the edges of the gym floor terrified that someone might ask me to dance. No one ever does and this is a great relief. One of my friends tells me that her older brother thinks I’m cute. This makes me feel good, but can I now just run away and hide? I have absolutely no clue how to handle boys. They are an exciting idea but the reality? Totally overwhelming! No one has ever told me what is expected of me, how to converse, anything. Mom is busy with other things and Artie, well, he would never ever have such a personal talk with me. I am 100% on my own. I watch what my friends do and try to stay out of trouble.
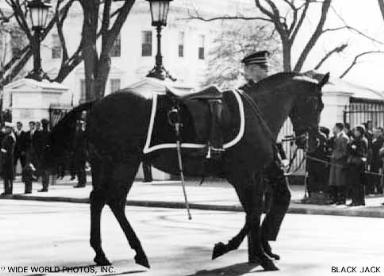
Then in 1963 President Kennedy is assassinated. Someone comes in the classroom and tells us. We sit there stunned not knowing what to think or feel and then we are sent home. At home we watch the funeral on TV when we should be eating Thanksgiving dinner. I am impressed with the horse handler doing his best to control the riderless black horse “Black Jack” jigging beside him down Pennsylvania Avenue, the cavalry boots turned backwards in the stirrups. It is so sad to see Jackie with her widow’s veil barely concealing her tear-stained face and the sight of little John-John, their son, fumbling his hand under the flag of his father’s casket and then saluting. This was the first time I am aware of politics.
Another excerpt from Just Walk Away – a memoir of growing up in Iowa
I started school at Norris Elementary when I was four years old because I would not be five until October and school started in September. So, I was a bit behind the rest of the kids but not by much. Norris was easy walking distance from our house. At first Mom walked with me and then because there were so many kids in the neighborhood the same age and going to the same place all at one time we walked on our own.
Kindergarten was fun because it was short. I think their plan was to wean us away from the freedom that we were used to at home so we’d segway into school with a minimum of consternation. Whatever they did it worked. I didn’t cultivate a hatred of school right from the beginning. We made puppets out of shoe boxes and one kid had us screaming with laughter when he made his puppet’s head shoot up across the room out the top of the shoe box body. And then there was nap time where we’d lie down on little rugs and pretend to be asleep. It was mostly fun and games. One game I remember was Telephone. In Telephone one person was chosen to think up a phrase or word and whisper it into the ear of the child next to him/her. In turn all the way around the circle the secret word would be whispered into the next ear until everybody had heard the secret word. Then the last person to hear it would say out loud what they had been told, and it was ALWAYS completely different from what the first person had thought of. Something very weird and different. We laughed and laughed. In Kindergarten we got cartons of milk to drink. Maybe this is where my disgust with plain cow’s milk began. I didn’t like chocolate milk because it was too sweet.
First grade was also fun. I guess we must have started to learn to read but I don’t remember doing it. One thing I remember is Mrs. Porter gave us milk in a jar which we traded all around constantly shaking until the butter and buttermilk separated. Then we ate the butter on crackers, and it was absolutely delicious! I didn’t have any problem making my block letters on the newsprint lined paper she gave us. Is this where we started learning to write cursive? I didn’t have any problem with that either.
I don’t remember anything from second grade except that I liked the teacher Mrs. McCollum. It must have been more of the same as we had in first grade. I do remember the tradition of giving May Baskets. We put candy, flowers and other treats in them and then we would leave the basket on the doorstep of our teachers and friends homes and then run away so they wouldn’t know who left the basket. One girl picked her nose and ate the boogers. We were very grossed out by this and ostracized her. We didn’t understand anything but then we were only 6 years old.
My favorite teacher was the 3rd grade teacher Miss Knoll who taught us the La Cucaracha song. La Cucaracha mentioned marijuana and I don’t know if Miss Knoll didn’t know any better, but she told us it was a cigarette.
“La cucaracha, la cucaracha
Ya no puede caminar
Porque no tiene, porque le falta
Marijuana que fumar!”
Here’s the translation: “The cockroach, the cockroach
Can’t walk anymore
because he doesn’t have it, because he lacks it,
a cigarette to smoke.”
She also had us make up pen names and write short stories. I chose the pen name Miss Ster because I couldn’t think of anything and like a little criminal, I peeked over to see what John Lee had chosen. He had chosen Dr. Sterling. I thought, “That sounds good.” So, I took that as inspiration and came up with a name. Miss Ster. Later Miss Knoll told me how clever I was, and it took me a minute to understand what I had done and what she meant. I didn’t get that I had chosen “mister” (Miss Ster). She set me up for a lifetime of enjoying writing even if it was somewhat based in thievery. I’ll never forget her.
Recess was interesting. We’d go out to the playground and play four square or tether ball or try to get killed or injured on the jungle gym, slide or merry go round. Some girls were showoffs and would hang upside down on the jungle gym and show off their underpants. Scandalous! During recess there was this one boy kept chasing me trying to hit me. I complained to the recess teacher, and she said a stupid thing. She said oh well he just likes you. Ignore him. I guess that was the beginning of me being conditioned to accept abuse in relationships.
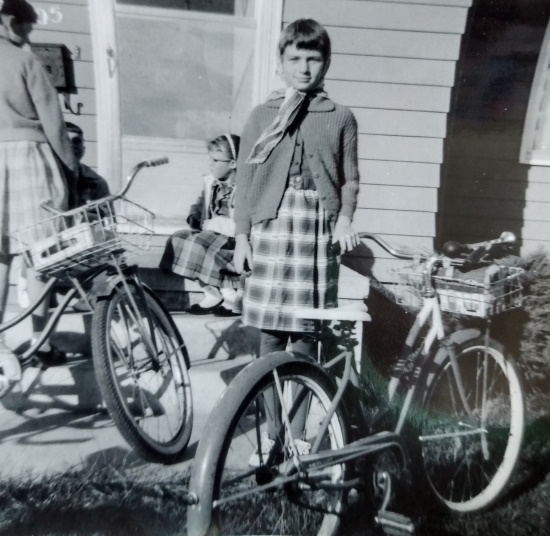
Norris was kindergarten through the third grade so when it came time to go higher, we all got on our bikes and went to Woodbury school which was a few blocks from downtown and a short ride from our homes.
Check out the metal lunch box in the bike basket. It looks like a house. Saddle shoes, Ill-fitting sweater, wrinkly old skirt, babushka.
On most days we rode our bikes. It would be a caravan of 6 to 10 girls from the neighborhood meeting up and setting off without parental supervision. It’s not like today where kids seem to need parental supervision for just about everything. Jamie, Patty, Marjorie, Sally, my sister Toni, Cindy, Pat and me. Where were all the boys? We didn’t seem to have any in our neighborhood. Cindy had 2 younger brothers. Maggie had one brother and, of course, Toni and I had our brother.
If the weather was bad, we had a carpool with one of the moms driving. They’d cram all those kids in the front and back seat of a 60s sedan. We’d be sitting staggered, one up and one back, to make us all fit in. Seat belts did not exist yet or if they did no one used them and would not have worried about it.
Lunchtime at Woodbury was always an adventure. Judy had matchstick potatoes in her lunch box, and I coveted them in the worst way, but Mom would never buy them. Instead, Mom would give me a hot dog and her ingenious and insidious way of keeping it hot was to put it in the thermos along with hot tomato soup but not warn me. Invariably I would go to pour the soup into the cup and out came the hot dog splashing soup all over the place. Mom! Kids had peanut butter and grape jelly sandwiches. For some reason peanut allergies were rare or non-existent in those days. You might get plain bologna on white bread. No mayonnaise or miracle whip. Just meat and bread. Kids had apples or bananas. Sometimes kids had the little fruit cocktail cups with peaches, pears and nasty red colored but delicious maraschino cherries. Only one cherry per cup please. They’re precious and rare, you know.
If you were super lucky you might get a chocolate chip cookie. They also had a free milk program where kids got chocolate or regular milk to go with their lunch. I hated milk as a drink. It was only good on cereal, so the taste was covered up. Milk tasted vile and chalky and clogged my throat. I still hate to drink milk. Milk is for calves not children but adults seem to think this is a good way to build bones and it might be but I don’t care. Let’s find another way.
After lunch we would be sent out to play in the playground. Woodbury had a super large playground with playground equipment, but we girls wanted to run to the farthest corner of the field and play around the giant cottonwood tree instead of on the jungle gym. We would play horses and pretend to be riding around on our magical steeds. It was great fun. We pranced around and trotted as if we were the horses ourselves.
Once some administrator or teacher decided that we should have cheerleaders for the football team so try outs were announced and a whole passel of girls showed up, including me, to demonstrate what we could do. It turns out we couldn’t do much and so, in the end, the teacher conducting the tryouts decided that all of us would be cheerleaders. The next weekend there was a game, and all we cheerleading girls showed up but only a handful of spectators came. There were more cheerleaders than spectators. We gave a few halfhearted cheers on our own and jumped around a bit and never came back to any other games.
In the fourth grade there was Miss Frandson who was way in over her head. We little hellions would frustrate the heck out of her for some reason. Apparently, she wasn’t trained to handle 8-year-olds which is perplexing to me because when I was teaching art in elementary school I thought the 8 year olds were the most lovely creatures. They loved me and I loved them back. It might have been because I was the ART teacher, and art was fun and not threatening or boring. Anyway, Miss Frandson’s solution to her frustration was to go into the supply closet, turn on the light, close the door and cry. We could hear her, and we had no idea what was going on.
In the 5th grade Miss Ward read thrilling stories after lunch (The Lion’s Paw and Around the World in Eighty Days). Every day I looked forward to her reading. We sat there rapt at the amazing stories which we could picture in our minds as if we were really there experiencing everything.
I had the biggest crush on my 6th grade teacher Mr. Melvin Peed. He was SO good-looking, like George Clooney, but can you imagine going through life with that name? Good thing he was so handsome! In sixth grade Mom decided I needed to learn a musical instrument, so she got me a rented violin from Smith Music Company. The violin was beautiful and the rosin for the bow smelled good. I dragged that heavy thing up to Miller Junior High where Mr. Fowler, the music teacher, tried to teach us something. I was bad. Let’s just say that. I sort of learned the basics of a French song Au Claire de la Lune. Screech schreech screech screech, schreech schreech. It was a disaster, and nobody could stand to listen to me practice, so the violin was out, and we got a piano.
We drove to Des Moines and shopped for a brand-new piano at Baldwin Piano company. Baldwin Piano Company was full of amazing pianos and wandering around the grand and baby grands was wonderful. For one thing the pianos smelled really good. They were dust free and beautiful and like being in a rich person’s house or so I imagined because I had never been in a rich person’s house. We didn’t have the room for a grand piano so we got an Acrosonic spinet that would fit in our living room without taking up too much room, and it had a beautiful tone. When I wasn’t practicing in the grumpiest way imaginable and lying about how much I had practiced, Mom would get on it and play her German oompa music. Artie would sing along sometimes. He had a pretty good voice. As a matter of fact, they both could sing pretty well.
The best thing about the piano was that it came in a great big wooden crate, and we kids decided it was perfect to make a computer out of. Big main frame computers were just coming in and somehow, we heard about them. Maybe I read about them in one of those million LIFE magazines Mom had or else how would we have known we could make one? We cut a couple of holes in the crate and labeled them IN and OUT. Then Toni got inside the crate with a vacuum cleaner and a typewriter. Someone would write a question on a piece of paper and put it in the “in” slot, the vacuum cleaner was then switched on to indicate something was happening (it was WORKING ya know), then Toni would bang out an answer on the typewriter, cut the answer into a strip, and put answer out the “out” hole. This was great fun for a while.
Anyway, I was to take piano lessons all through elementary school, and junior high from Joyce Jackson first and then Audrey Hafar next. Joyce gave lessons in the basement of Smith Music company. It was a little closet room just big enough for an upright piano and us sitting at the piano to play. Audrey Hafar was a concert pianist, and she had a grand piano in her living room on Grant Street a couple blocks from downtown. Mom dropped me off and then I would go in there and pretend I had practiced. I wrote lies on my practice record sheet. I’m sure Mrs. Hafar knew I was fudging or thought I was the most untalented piano player in existence. She had the patience of a saint. I couldn’t have handled students who were such obvious liars.
In the fifth or sixth grade, I can’t remember, which we girls got The Movie. It was called Very Personally Yours. Oh, thanks but no thanks. I don’t want it. It was about what we girls were going to experience very soon, and we were all perplexed what this actually meant. We kids had had The Talk by Mom and my reaction was how could the husband do that? The pee hole was so very small. Mom was not a good explainer. The Movie was even more perplexing and so I put it out of my mind.
There was always turmoil in our house but one place where there wasn’t any was while we were on vacation.
Vacations were great except just as we drove away from the house. Mom and Artie would immediately begin arguing when we got in the car because Mom would remember something she forgot, and Artie wanted to get going! So, we kids sat in the back of the station wagon that was long as the Queen Mary and heard every word of the disagreement in the front seat. Artie would say we don’t need it, but Mom would insist, and he’d go back to the house angry as all shit and when we got going again there would be tension.
But once we left the city limits and made progress things settled down because there was the open road before us and all sorts of things to distract us as we drove along. Mom would say Art keep your eyes on the road and Artie would ignore her. He’d be looking here and there at whatever interested him but he never got us in trouble because he was a really good driver. I suppose he got his skills flying airplanes and you have to be competent to fly one of those or you’re dead meat.
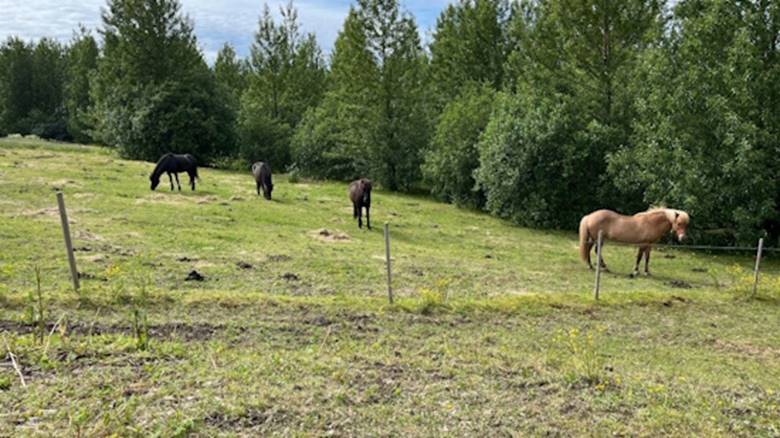
We didn’t have cell phones, of course, so the only thing that was available to us was looking out the window. Reading a book was out of the question because I would get motion sickness and that was not fun. We played a game that we made up which was “I Get Those Horses!” This was simply keeping an eye out for a horse or horses and then yelling out “I Get Those Horses!” You kept a tally of how many you saw and when we arrived at our destination the winner had the satisfaction of winning having seen the most horses. No prizes, nothing. Just satisfaction.
When it was warm we’d drive along with the back window of the station wagon rolled down and we kids would be in the back with the seat folded down. If mom had brought bread along to make sandwiches with, she’d let us have slices of the bread which was usually some white bread like Wonder bread. We’d tear off little pieces, wad it into balls and throw the wadded-up bread balls out the back window to watch them bounce on the pavement as we sped away. Can you imagine kids doing this nowadays?
When we were older and could read, we’d keep our eyes peeled for strange and unusual license plates. This was only on an interstate highway like Interstate 80. State highways were only traveled by state cars. If we saw one from New York or California, well, that was pretty thrilling. I don’t know if this made us smarter or anything because we weren’t glued to a cell phone screen, so you tell me. Were kids smarter back then because they had to entertain themselves?
Some vacations we drove to Mom’s mom in Illinois and some to Artie’s mom in Ohio. There weren’t interstate highways at the time, only two-lane highways, so we drove on Highway 30 which would now be considered “the back way” through DeWitt and Clinton, Iowa and over the Mississippi River on a bridge as tall as a skyscraper. Highway 30 was originally known as the “Lincoln Highway” and it was the first coast to coast highway in America. Right through the middle of little old Marshallberg.
Once we got into Illinois you would see off in the distance the giant slag piles from mining which looked like volcanoes. Otherwise, Illinois was flat as a pancake and boring as heck. When we went all the way to Ohio we would go through Gary, Indiana where there were steel mills going full blast day and night and that made the air stink to high heaven of sulfur. The sky was lit up orange at night. It was like driving through hell. No, really. We peered out the windows of the car as we drove along appalled and amazed. How could people live here? How could people work there? When Interstate 80 was built we skirted that whole area, so I don’t know if it’s still like that.
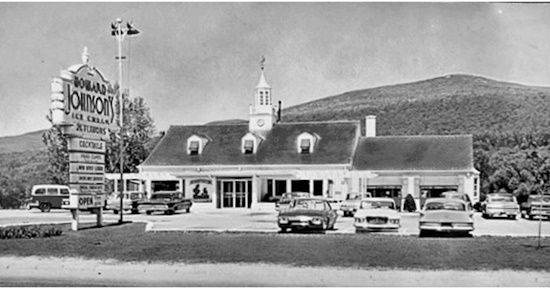
Then there were the Indiana and Ohio turnpikes where every few miles we would have to stop and pay a toll. You drove up to the gate at the toll booth and gave the toll taker a few coins. Howard Johnson restaurants were at rest stops along the highways, but Artie would only stop for potty breaks, never for meals! He frustrated the heck out of me. He just wanted to get there wherever “there” was. He made it no fun at all. Howard Johnson’s! It was a siren call to us kids bored out of our minds in the back seat of The Long Station Wagon. They had cool food in the restaurant. I knew it! They also had souvenirs and shelf upon shelf of candy and snacks! I knew this, too, but it would be years and me growing up to finally check it out and then I found that it was not the least bit interesting and overpriced for what you got. But back then we thought it was so cool and wonderful.
When we first started going to Artie’s mom, Grandma Daisy, she lived in Warren, Ohio. She lived in a big brick house with a porch as wide as the house. There was a cuckoo clock at one end of the living room and we kids would sit in front of it waiting for the cuckoo to come out. We were easily entertained! She had a nice cocker spaniel and a cat she called “Tagger” which was how she pronounced tiger. Gramma was kind of a hillbilly, and this came out in various ways. She was prejudiced against everybody who wasn’t white. She called black people “coons” and Chinese people “slants”. She was even prejudiced against people of her own family and cussed out anybody who disagreed with her. When I think about it, she was very much like Mamaw in our Vice President’s memoir “Hillbilly Elegy”. She hated my mom, and lord knows why, but I suspect that it was because Mom took her beloved son Art away from her. She was also a college educated person which would have been an anathema to her so very unlike the people she was comfortable with.
Gramma had suffered at the hands of her first husband, Artie’s dad, Ed. He was a mean sunnavabitch who would come home drunk and beat the shit out of her. I don’t know if she got the chip on her shoulder from living with him or if she was always that way. Anyway, she doted on my dad and would get him out of school when he was a kid to accompany her on her many doctor appointments. She was a hypochondriac. Eventually she divorced him and married Ephraim Whitaker, also known as Ed. He was from Kentucky and was a wonderful human being. For one thing he had a great sense of humor and maybe that helped him get along with our cantankerous Gramma Daisy. He had lost one of his fingers in a machine shop accident and he joked around with us pretending to lose that finger and we laughed and laughed. He had a pack of marvelous coon hounds, and he would go out with them to hunt raccoons.
Later on, Grandma Daisy and Grampa Ed moved to a farm in the country near Cortland, Ohio. There she and Ed lived in a giant white two-story house with a beautiful veranda. It had been a boarding house and had 4 large apartments. Why was there such a large house in the middle of the fields with no town nearby? Maybe it was for field hands and their families because the house was just down the lane from a gigantic dairy barn. Daisy and Ed lived in one of the apartments and when we visited, we stayed in one of the others. I don’t know why but the other apartments were always empty and so was the giant barn.
The barn was now home to only pigeons and mice. I roamed all over it top to bottom as far as I could go. The barn was built on a slope, so the back of the understory was open to the fields where the cows grazed. First, I would go through the understory door into the bottom part where the cows would have been herded in and milked. Cobwebs everywhere and filthy as all get-out. Then I’d walk up a short stairway to the level above where the hay had been kept. This level was at ground level so tractors could drive in and unload the hay. It was like a church cathedral. Up in the rafter pigeons flew back and forth. It was dark and impressive. Pigeon poop everywhere in the old dusty hay.
Out there in the country was a critter paradise. In the lane to the barn after a rain tiny land crabs would be in the ditches where they had built themselves little towers made of pelleted mud to escape being flooded out. Mostly though we hung out in a rowboat on the little pond that was ringed with willow trees. The pond was clogged with duckweed which made it a perfect haven for frogs and crawdaddies. In vain we tried to catch the frogs, but they would disappear beneath the pond weeds as soon as we got close. They were too wily. You would see one and you would try to quietly pole up to it and, bam! It would disappear beneath the surface.
We were successful in catching a crawdad now and then because the little bastards were aggressive and would defend themselves by catching hold and pinching anything we poked at them. We flung them into the boat bottom and then had no idea what to do with them because they were waving those nasty pinchers at us. We eventually got them back into the pond, probably doing the reverse which was letting them pinch the end of a stick and then flinging them back.
Even though Grandma Daisy was a pistol and hard to get along with one thing she had was nice smooth bed sheets. At home our sheets were always rough by comparison. I don’t know why. Maybe Mom bought cheap sheets to economize. I remember those smooth Gramma sheets and how they were so nice to sleep on. Now I always get the best sheets I can afford. What do they say? You spend half your life in bed so you might as well make it comfy. Grandma Daisy inspired me.
Grandma always had Special K cereal with milk for breakfast and oftentimes green beans with bacon for dinner. She cooked the dickens out of the beans until they were nearly mush. She used whatever beans she got from her garden and in her eyes the fool proof way to make them edible was to boil them to death. The bacon made them salty and actually quite tasty, but the texture left something to be desired. She also had giant containers of Metamucil on her counter. Mom said she had diverticulosis/diverticulitis and needed fiber. Mom could never remember which thing she was afflicted with. Maybe grandma should not have cooked the dickens out of the beans so they might have had any fiber left in them. Otherwise, Gramma’s cooking was nothing to write home about. Not like Gramma Frieda whose cooking was always delicious. One time I noticed a bottle of some kind of rotgut wine on the kitchen table. I unscrewed the cap and sniffed it. It was repulsive to my nose and when I looked at the label it said it was bottled a long time ago like an aged wine. I remarked out loud well that explains why it smells so bad. Look how old it is! Everyone laughed their heads off at my innocent remark. I had my first bacon, lettuce and tomato sandwich at Grandma Daisy’s. We only had bologna or peanut butter at our house. I never thought that tomatoes, lettuce and bacon on toasted white bread smeared with mayonnaise could taste so good!
When we would visit Daisy and Ed in Cortland the folks would send us off to hang out with Uncle Bob and Aunt Shirley. Uncle Bob was my dad’s older brother. He was a long-haul truck driver, uncouth and crass. He cursed a lot. He would have made a great muleskinner in the old days, and his personality would have suited that rough lifestyle to a “t”. He was like Gramma Daisy in that he was prejudiced against anybody who wasn’t white. He was even prejudiced against some white people like Italians or Irish. He called Italians “dumb dagos” and Irish people “micks”. Of course, he called black people “niggers”. He did not have one lick of remorse for doing this. I don’t know how Aunt Shirley put up with him. Actually, later on she didn’t and they divorced. Thankfully we didn’t have to hang out with him much. Instead, we hung out with Aunt Shirley. She was a super nice person, pretty and kept an immaculate household. Why is it that the nicest women are very often with the most unpleasant men? Our cousins Sandy and Ricky were quite a bit older than us, and we did not see them very much. Only Ricky really. I have no idea where Sandy was off to. Ricky was in his late teens and had a summer job baling hay. In those days the bales were bucked by hand, so he was very, very strong. One night he came in and showed up at the bedroom door to say hi. Toni and I squealed as he held out his extremely strong arm at a 90-degree angle and let us take turns hanging off his arm.
In the daytime we messed around in the creek behind their house. It was a beautiful peaceful place overgrown with towering trees that made a canopy over the water. The creek bottom was wide and clear, and the water ran through there and was perfect for splashing in and exploring. After we were done with that, we would troop back to the house. Their two-story brick affair was very different from our modest little one-story house back in Iowa. After lunch I was tasked with helping Aunt Shirley clean up. Once the dishes were done, I noticed that some water had splashed on the floor from the dishwashing and being a helpful child, I took it upon myself to grab one of Aunt Shirley’s cloth towels to wipe it up. Aunt Shirley’s eyes bugged out. Then she laid into me that I had used a HAND towel and not a floor towel. Didn’t I know how unsanitary the floor was? I felt so bad! Back at home my mom wasn’t a stickler for those kinds of details. We were uncivilized band of ruffians in Aunt Shirley’s eyes. These girls don’t know the difference between a floor towel and a hand towel!
One vacation we did something really ambitious. We drove all the way to California to visit my mom’s sister LuVerne who lived in Santa Monica, California with her husband Bob and their kids Bette and Brad. We pulled a small house trailer from Iowa through Nebraska then Kansas and into the panhandle of Texas. From there it was all the way through New Mexico and Arizona to arrive in California. We pulled into Kansas in the dark and when I woke up and looked out the window, I was flabbergasted. The horizon was absolutely flat and featureless! Not even a tree! Just grass as far as the eye could see. I could hardly believe my eyes and I’ve never seen anything quite like it since although I’ve always wanted to. Maybe the Llano Estacado in West Texas is like that.
Western Kansas goes on forever
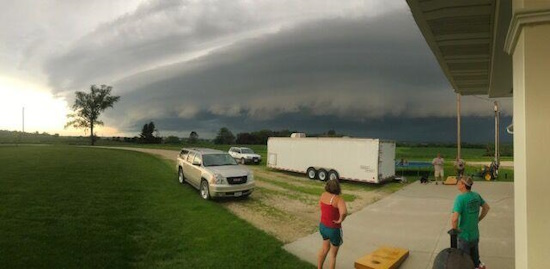
In the Texas panhandle we drove through the worst thunderstorm I had ever been in, even worse than the Iowa thunderstorms which were absolutely in a class all their own, so you know the Texas storm was a storm to end all storms. This thunderstorm made the Iowa thunderstorms seem wimpy. The lightning bolts were huge and seemed to hit right next to the car as we sped along in the dark and downpour. I was grateful my dad had experience flying airplanes into France during WWII where I’m sure they got strafed by ground to air fire. Driving in a furious thunderstorm was probably similar but less risky. The air had a weird smell to it. Artie said it was burned air and he called it ozone. I don’t know how he knew this. Of the lightning Artie said, “Don’t worry. We’re in a car with rubber tires so if the lightning hits us it will travel into the ground.” Somehow that didn’t console me. Anyway, right or wrong, that’s what he said.
After the thunderstorm ended, we arrived in Amarillo, Texas and Artie was on a mission to find pinto beans. He had a thing about beans. Well, I did, too because he made the best beans in the world from scratch which I could eat and eat and eat. He called them Shanty Beans and they were made with great northern beans or navy beans and baked in a casserole for hours with only a little onion and salt pork for seasoning. They were from a family recipe that came from Canada. Years later I would see articles about the food a lumberjack might eat and sure enough those beans were a on the menu. So here we were in Amarillo and being a Hispanic community Artie knew they would have pinto beans and he had to have some. I guess they were not available in Marshalltown or maybe he just wanted authentic ones from the land where they were common. We drove up to a little, what looked like, Mexican grocery store, parked the car in the parking lot sopping wet from the storm and Artie got out of the car and went in. He came back out with a big smile on his face and a giant bag of beans cradled in his arms.
From then on all we had to entertain us was throw bread out the rolled down back window and watch it bounce. Bounce, bounce, bounce until you couldn’t see it anymore. Years later I would call Wonder bread white Styrofoam because I was a hippie and into whole natural foods. Dad poo-pooed the whole grain bread I endorsed. He said your bread has too much flavor.
All this car travel was without benefit of seat belts by the way. It’s a wonder we survived into adulthood and I’m not joking. We did a lot of things back then that are now considered dangerous.
• Eating food cooked in aluminum pans.
• Rolling raw mercury around in our hands and applying mercurochrome to wounds (it has mercury in it).
• Spraying asbestos onto the Christmas tree to make it look like snow.
• Paint the house with lead-based paint.
• Filling the tank with gas that had lead in it.
• The county sprayed DDT around our homes to kill mosquitos.
Then, of course there were all the dangerous games and equipment we played on:
• Teeter totters: when someone was in the air, the person on the bottom would jump off and the person at the top would come crashing down.
Yeah, do it. I double dog dare you to jump off.
• Evil Knieval style bike riding off makeshift plywood jumps.
• Riding loose in the back of a pickup truck
• Jarts aka Lawn Darts
Traveling west on route 66 we pulled over at a way station in the Painted Desert and the Petrified Forest of Arizona. I saw my first horned toad lizard and chased it until I was able to catch it. I wanted to keep it, but Mom made me let it go. In the Petrified Forest we picked up small pieces of petrified wood that we would keep as souvenirs without thinking about the consequences. Years later, in 2021, when we were driving through on our western trip with our Long Trailer, we found that the park service now had signs posted everywhere “Stealing is illegal” and check points at the exits were there to search your car for purloined petrified wood. By the way Holcomb, Arizona seems to have more petrified wood than the park itself. Holcomb needs the wood because there was nothing else there to recommend it. Big chunks of petrified trees on every corner and I suppose they are one of the reasons the park now has laws. We, in our ignorance, surely contributed to the law imposed in the Petrified Forest. We were thoughtless in taking bits of petrified rocks.
In the Mojave Desert outside of Needles, California we stopped at a gas station late at night and in the dark a hot dry wind blew. The pavement was still hot enough that my rubber flip flops started to melt and stick. It was weird to experience that hot wind. I wondered how anyone could live out there. I can still feel what it felt like all these years later and when I’ve been through the Mojave in recent years, I still wonder how anyone can live there. I suppose it’s cheap and that would be for a good reason. It has terrible weather. I mean, terrible all year long.
When we finally started to get near Los Angeles I could see that the air ahead was orange. These were the days before pollution control, and it was nasty. Once you got into the smog cloud you wouldn’t notice it, and no one seemed to be upset about what they were breathing. It kills me to listen to people denying climate change and wanting to roll back regulations on emissions. I guess they grew up where the air was clear or are too young to remember how bad it was.
In Santa Monica the air had an interesting scent to it that I later figured out was partly the scent of the ocean and eucalyptus and partly smog. In the back yard a mockingbird sang its heart out day and night. At the beach we played in the waves and in the sand. Mom herded us around like we were little land crabs.
On another vacation we drove to Havre, Montana to visit Mom and Artie’s friend from their Chicago days. I don’t remember his name, but I remember a little about Havre and a lot about how we got there. Havre, Montana is literally a few miles from the Canadian border and is a nothing little town. Sorry about saying that but it’s true. I know this because in 2021 Marty and I drove through it on our big loop from California through the west with our travel trailer. The only thing I remember about Havre from when I was a kid is that it rained a lot. I remember the dark apartment of the friend. Nothing much else registered.
What does register were the many places we visited on the way there. I remember Mt. Rushmore shrouded in clouds so you could barely see the giant faces way up high. Lincoln looked like he was crying because of the water dripping down his face. I remember panning for gold in Deadwood, South Dakota and shopping for agates and other souvenirs. Speaking of agates. and remember I was a nerdy little rock hound, near the Custer battlefield monument I found my first wild agate in the field. Oh joy!
On the way to Sheridan, Wyoming but miles before it I saw way off in the distance what seemed to be very low clouds. Suddenly it dawned on me. Was this snow on mountains? Mom, look ahead, are those clouds or is that snow on mountains? The first time I ever saw a snow capped peak was on the Big Horn Mountains near Sheridan, Wyoming.
We camped in Yellowstone National Park near Yellowstone Lake which seemed like an ocean to me. Artie went fishing for trout and because he was a fishing genius, he caught four big trout right away. Once he had them cleaned, though, he called me over and said we can’t eat them because they have liver flukes which he showed me. We left them on the bank for the bears. Speaking of bears, sleeping in a tent became problematic at night in the dark because bears were on the prowl for anything they could find to eat. Toni and I clutched each other in terror as we listened to the snuffling going by outside the tent walls. They sounded like a strange vacuum cleaner. We slept in the car from then on and I’ve never been quite comfortable sleeping in a tent ever since. Something is out there that might come and get you!
When we went on vacations to Illinois to visit Mom’s mom Artie would drive straight through. Same business, Artie behind the wheel on a marathon to “get there”. Then when we arrived at Gramma’s house the first thing Artie would do was ask Gramma to make him a ham sandwich. Man, oh man, Artie loved those sandwiches! Well, truth be told we all did! Gramma made her own bread and cured her own ham so even if it was 1 a.m. we had to eat one before we were allowed to get some sleep. Grandma Frieda’s house was a 2-story house that came from Montgomery Ward, and it was on Oak Street in teeny tiny Watseka, Illinois.
Gramma had her big bedrooms fixed up with queen beds and handmade quilts she made herself. Every once in a while, in the middle of the night, we got woken up by the bed being shaken. At first, I thought it, “It’s a ghost!” but later I figured out that it probably was a big truck on the next street over which was a highway through town. This was never proven, and I don’t believe in ghosts even though my mom and my sister claimed they saw some. I loved to rummage through Gramma’s chest of drawers and look at the stuff she had in there. She had such cool stuff! Aunt Jeanette’s room was off limits and too bad because it was the nicest room in the house. There was a big oak dresser with a filigreed mirror and a big oak bed.
There was only one bathroom in the big house, and it was upstairs. There wasn’t a shower as this was an old-fashioned house and to bathe there was a big claw foot tub. The water coming out of the faucet smelled terrible, like sulfur or iron so Gramma put lilac bubble bath in it to make it smell better. We kids would plunge in there and feel like we were in a swimming pool because the tub could hold a lot of water. The lilac made the water smell better but not a whole lot.
Mrs. Sadie Roberts lived next door in an unpainted clapboard house with a big porch and an upright piano in the living room. She was a very friendly person but looked like a spook with dark circles under her eyes and veins sticking out of her skinny arms. She scared us kids. Poor Mrs. Roberts. She was so nice and told us all about her exploits as a young girl and how her mother was so mad at her when she got her long hair bobbed. It must have been in the Roaring 20s when she did it because she was that old. There was a blackberry patch between Gramma’s house and Mrs. Robert’s house that filled the whole lot from street to alleyway and we kids stuffed our faces with the ones we could reach getting stuck by the thorns but not really caring too much.
One of the best things about Gramma Frieda’s house was the porch swing. We kids would go out there and get on it and swing it ferociously like it was a playground swing. Looking back, it’s wonder that Mom and Gramma did not come out and tell us to swing slower or stop completely. That swing could have come out of its moorings quite easily the way we swung! We would have either catapulted ourselves right off the porch as there was no back railing or onto the floor of the porch itself. Mom and Grandma were both worry warts who rode hard on us kids for everything. They were both sure that disaster lurked around every corner. But for some reason the porch swing was not one of their worries.
Eventually we’d go out to visit the Hurliman’s farm where Aunt Leona and Uncle Louie lived with their 3 kids, Joan, Aaron and Sandi. Sandi was my age because Grandma Frieda’s family was big, and her youngest sister Leona was not much older than my mom. We’d ride the Shetland pony Prince through the corn fields and have big picnics under the elm trees on the front lawn. There’d be potato salad, cole slaw, fried chicken, corn on the cob, pickled ham and corn relish as well as fresh rolls and butter. I don’t know how I didn’t get fat. It must have been all the running around I did. We kids were always on the go.
Excerpt from Just Walk Away – A Memoir of Growing up in Iowa
We spent all our time outdoors unless it was really bad weather. This is not what many children experience nowadays. The only time we were indoors was when it was crazy hot and humid, a howling blizzard or a thunderstorm with tornados. In other words, to keep us indoors it had to be extreme weather conditions. Nowadays it seems that the least little inconvenience keeps us indoors. This is wrong in my opinion but what do I know?
Summer
If we were having extremely hot and humid weather, my refuge was our finished basement where there was a wall of shelves Artie had made for Mom and she stacked the shelves with hundreds of Life magazines that she had saved beginning of time. We didn’t have central air conditioning, so the finished basement was the best place in the house. Central AC would come later. It was cool in the basement in the summer as it usually is underground, and I went cover to cover in every single one of those magazines. I had my favorite issues, and I had ones I tried to avoid. There was one magazine that had primitive drawings of Indians torturing poor pioneer children. I can still see it in my mind, so you know it made an impression on me. I knew exactly what pages the images were on and when I came to them, I would skip over these pages because they were just too gory.
All in all, though, I really enjoyed those magazines and learned a lot from them. I learned a lot about movie stars and celebrities and to this day I know all the old-time stars by name and can identify them. Big whoop you might say but I’m not worried. They say we only use about 15% of our maximum brain power so I figure I have plenty of room for more useless information. Maybe someday I’ll go on Jeopardy and win the whole thing. Then all that useless information won’t be for nothing. Later on, when I became a graphic designer, that innovative Life magazine picture-centered layout inspired me and informed my design sense. This was also a foundation for understanding composition in painting and drawing. I absorbed it visually because like the commercial character said, “I am a visualiste. I see things visually.” (you must say that with a French accent by the way.)
In summer we went to the outdoor municipal pool at Riverview Park, and it was there that I learned to swim but not to jump off the dive board. Oh No. I did that once and only once because when I got brave enough to try it, on the way down for the brief second it took, my stomach leaped into my throat. It wasn’t such a high diving board, maybe 10 feet or so, but it seemed high to me (remember I was little) and that scared me to death, so I never did it again. We would play in the big pool and then we would laze around on our towels and eat salty popcorn or fudgsicles from the snack bar. Getting dressed in the roofless ladies’ side was weird because I wasn’t used to seeing naked older ladies and I would try not to stare but I couldn’t help myself. The peculiarities of their bodies left me revolted and fascinated at the same time. I had never seen any naked people before, not even my mother and certainly not my dad. I was shy so I always tried to change into my suit somewhere that was private, but it wasn’t always possible.
Back home in the backyard we played Annie Over which was a game of throwing a ball over the roof of our garage to our friends on the other side. We’d yell Annie Over! and throw the ball as hard as we could. One of two things would then happen, and you never knew what it would be and that is what made the game fun. First, the friend on the other side would not know where the ball was coming from. They had to keep their eyeballs peeled for it to come from anywhere. They would either get lucky and it would, by some miracle, come straight to them and they could catch it, or it wouldn’t, and then they would have to run to get it wherever it came down. If they caught it before it hit the ground, they were allowed to run around the end of the garage and try to tag/hit us with the ball. This was a game of honesty. Fair and square. We didn’t ever consider faking it or at least I never did. So, when we threw the ball, we had to then be ready to see if our friend would come tearing around the side of the garage and get us. If they didn’t catch it, then they were to yell Annie Over! and throw the ball back to us. There would be a pause where uncertainty prevailed, and nothing was happening. It was a nerve-wracking game but fun.
We also played jacks and pick-up sticks. I was very good at both because of my steady hands, and ability to keep my eye on the ball, with quick reflexes. Hopscotch was improved after we figured out that we could use little ball chains that were better at landing and staying on the square than the average rock which invariably skittered off. I learned to “keep my eye on the ball” from Artie when he’d pitch baseballs to us. “Keep your eye on the ball,” he’d say, and then underhand pitch, and as often as not I could connect with that ball and hit it over the fence.
Every little girl knew how to play jacks…
… and pick up sticks…
… and hopscotch
We skated up and down the newly paved roads of our modest subdivision in skates that attached to your shoes with clamps. A little key tightened the clamps on the skates to your shoes. It was a good thing that our roads were pretty new with very few bumps and ruttles. Even so someone would always come home with a bad case of banged up knees or elbows. Skinned knees were common, and we didn’t have elbow pads, knee pads, hand pads, helmets or nothing. How did we survive?
I learned bike riding from Artie who ran with me holding on to the back of the seat while I pedaled as if my little life depended on it. All of a sudden, Artie yelled, “You’re on your own!” and I’d be flying! My first bike was a fat tire Schwinn girl’s bike and boy did we wear out that bike. We pinned playing cards with clothespins to the bike struts so when it was going it would make a racket when the cards clipped the spokes. Our half-assed hot rods.
Summertime also meant Girl Scout camp. We were sent to camp out west of town at what was known as Juliette Low Girl Scout Camp. I’m not sure but I don’t think I ever progressed past the Brownie stage, but I still got to go to the camp. We hiked through the woods, and the counselors showed us May apples which they said were edible. We went to the activity hut and made little baskets out of reeds. The reed set had a wood base with holes in it and we threaded spokes into the hole, bent them over so they would stay put and then we wove the weft pieces in and out and through around and around until we had a satisfactory basket. We folded the upright spokes over in the same way we folded the bottom pieces and then the whole thing was anchored and there you have it. The counselors also showed us how to braid plastic strips into lanyards for badge necklaces or key chains. We ate our meals in a big dining hall which of course there it was a ruckus and loud with the conversations of girls in second and third grade, ages 7-8 or 6-8, and the older Girl Scouts who might be as old as the twelfth grade.
When it was time to sleep, we were assigned to tents, and these were the big canvas army tents that were on raised platforms but open at the bottom. There were 4 campers to a tent. In the dark we would shine our flashlights on the walls of the tents and if we saw a spider or centipede, we would then spray it with bug spray until it fell off dead. Of course, we didn’t get all of them so when we fell asleep invariably someone woke up screaming because something had crawled across her face. The tent was stained with hundreds of bug spray spots. It was a grand time.
Summer Saturday mornings were strictly for cartoons on the telly. We kids got up the very minute the cartoons started at about 7 or 7:30 am. Mom and Artie were still asleep. Then we’d marathon watch Heckle and Jeckle, Mighty Mouse, Tom and Jerry, Bugs Bunny, and Rocky and Bullwinkle. Then there was Sky King, Roy Rogers, Fury the Wonder Horse as well as My Friend Flicka. We didn’t have a color TV until I was a lot older. I watched the Beatles on The Ed Sullivan Show when I was 13 on a black and white TV. Color came when I was in high school.
I got a small record player that played 33/45/78 rpm records. We were big into musicals for some reason. I had a My Fair Lady album with all the show tunes, and I sang along and danced around. Somehow, I learned the words to Wouldn’t It Be Loverly? My friend Maggie had a Gypsy album, so we went up in her finished attic bedroom and sang along to Let Me Entertain You. We loved Natalie Wood, and we were innocent. We didn’t even consider that the musical was about a stripper, (bump it with a trumpet!) and I guess our parents didn’t know or thought it was harmless fun. None of us grew up to be exotic dancers so the exposure didn’t lead us to perdition. We just liked the music and the spectacle of it. I loved Johnny Horton singing North to Alaska and Gene Pitney singing The Man Who Shot Liberty Valance. OK, so I was cornball.
Speaking of cornball, I would go over to Jamie’s house to her finished basement where she tried in vain to teach me to dance while her record played the latest tunes. She did her best to get me to do the Mashed Potato and the Locomotion, which was a line dance. “Everybody’s doing a brand-new dance, now, c’mon baby, do the locomotion!” Talk about two left feet. I really wanted to dance well but I was like a colt all arms and legs tangled up. I didn’t really learn to dance until years later when I was in college. I finally stopped being self-conscious and I credit the hippie time for getting me over it. Then when the disco era dawned, I was adept enough to get into Saturday Night Fever type disco dancing and took lessons with my husband Paul. I got really good and could do merengue, tango, fox trot and cha cha.
Every summer we would have terrible thunderstorms where wind, thunder and lightning were just insane. And I mean insane! If a storm happened at night, we’d watch the light show from the safety of our house always on the ready to dash to the basement. The lightning fascinated me, but the thunder was loud and scared me. There would be the flash of lightning, and because the bolt was so close simultaneously there would be the tremendous clap of thunder and the house and windows literally shook. Our Weimaraner dog whimpered while she hid under our beds, and I didn’t blame her one bit. I wanted to crawl under there with her. Sometimes there would be a tornado alert and mom would herd us into the basement. She was of the opinion that if we sheltered in the southwest corner of the basement that the house, if hit, would fall away from us. She also was confident that Marshalltown would never get a direct hit from a tornado because the Indian lore she read said that encampments built where two rivers converged were safe. We had Linn Creek (pronounced “crick”) that ran through town and flowed into the Iowa River on the town’s northeastern part. We went to the basement anyway. She wasn’t that confident apparently.
She also said that we were to open windows on the side of the house facing away from the direction where the storm was coming from because she claimed that would equalize the pressure inside the house and the house wouldn’t explode. She also said look at the TV while it’s turned off and if it glows greenish then a tornado is approaching. It turned out that all the things she thought were completely wrong but at the time I believed her and somehow, we managed to stay safe because, in truth, no tornado ever happened. The truth is don’t open the windows at all because the wind will slam through your house and rip it apart. Tornados also don’t always come from the southwest. That is bogus. I don’t know about the TV set glowing. Maybe that’s true somehow with the old cathode ray tube TVs.
Years later, though, a tornado tore right through the middle of Marshalltown, straight down Main Street, so the truth came out. Marshalltown was indeed vulnerable all along so being where two rivers converged didn’t save our town.
The green indicates a lot of hail in the cloud.
Growing up in Iowa gave me great respect, interest and understanding of weather. On sultry summer days you could expect that by late afternoon there would be some kind of thunderstorm. Large or small, you never knew. If it was a big storm there would come the great wall cloud from the west. You could see it coming for miles because Iowa was flat as a pancake in that area. The main event of the storm, the thunderhead, was many miles high, maybe even 7 miles high which is how high commercial jets fly.
The wall cloud in front and below the advancing storm would be a creepy shade of green. All was ominously still and silent before the storm, and then the gust front hit! All hell would break loose! The rain came down in great sheets and giant drops. The wind could blow the small trees almost to the ground and branches were blown off the big trees.
Once I was looking up into the storm clouds from my bedroom window and I saw several tiny little tornados way up high. In Illinois while visiting my grandmother there was the unmistakable funnel cloud miles away silhouetted black against the western sky at the edge of the storm. Since then, I’ve always loved weather and clouds and am bored if it’s the same all the time.
Spring
Spring was great. Mom would finally be able to open the windows after the freezing winter, and it was bliss with the breeze blowing the curtains. Mom would then take the laundry out to the clothesline and after they’d been flopping in the wind the clothes and bed sheets would come in and smell fresh as the air that dried them. Nature’s dryer. It’s the best.
Unfortunately, there might be a lot of rain in the spring, and the Iowa River would flood. Riverside Park was flooded a lot and up into the streets of town close to the river. Of course, the fields north of town became giant shallow lakes and I guess that’s what made the fields so fertile with all the soil being deposited there. Then the county figured out that they needed to build levees, which they did so then the only parts of town that flooded were the fields north and east of town. In the western part of town, the homes were built on small bluffs, so they were safe.
Sometimes after a particularly ferocious cloud burst, the storm drain at the curb in front of our house would clog with debris and back up into a little lake all over the road. Mom would let us go out and ride our bikes through it or just splash around. It was paved so there wasn’t any worry about stubbing your toe on something. You heard thunder off in the distance from the receding dark cloud that was still dumping a quarter mile away and the air would be humid and cool. This was great fun.
After a hard rain, I would go with Artie to look for arrowheads in the plowed fields. It had to be after a hard rain so the arrowheads would be washed clean and stand out from the dirt. Artie would say, “Look for something that doesn’t fit.” When he found something, he’d show it to me and say, “It fascinates me that the last person to hold this (arrowhead, hide scraper, etc.) was the person who made it.” He, of course, was referring to an Indigenous person. Because the fields were wet and muddy, our boots would get covered in heavy mud, but we didn’t mind, and we thought it was a kind of laughable Mud Foot! Artie said, “Don’t step on the new corn coming up. The farmers will not appreciate it.”
Sometimes a hawk would circle overhead, and I figured out how to whistle like they do and if the hawk whistled back, I was 100% convinced that we were communicating. The sky would be blue and clear and small cumulous clouds scudded overhead in the breeze coming in from the north over the Great Plains. I was in my element.
Fall
My favorite time of year was fall. By fall the Iowa River would be very shallow, and we would drive north out of town to Timmons Grove County Park, walk down to the water and wade for miles up the middle. Sometimes we brought inflated truck or car tire inner tubes that we got from a tire repair place and then we would float downstream. If we were wading Artie told us to avoid the downstream end of a sand bar where the water was deepest because the sand was soft and there it could suck your foot down and you’d sink in. The rest of the river was no deeper than your calf and easy walking. We’d keep our eyes peeled for river clams and when we found one, we’d load them up in a bucket of river water, take them home and then leave them alone until their foot came out looking for food. They were big and heavy, and no one ever ate them. Buttons were carved out of the shells in the olden days.
In fall clouds of starlings would fly overhead, and I experimented with what would make them take notice of me. To my amazement the very first thing I tried worked. I clapped my hands as loudly as I could and lo and behold, they flew down, out and away from the clap. It was beautiful to see. Like a school of fish in the sky. I think they thought it was a gunshot, because the sound of my clapping hands sounded like the crack of a rifle and I’m sure they had been shot at plenty of times. Who says animals are dumb. They are most decidedly not!
On weekends we would beg Artie to take us to Polley’s farm north of town so we could ride out through the cornfield stubble to the timber on Al’s barn sour horses. There were some young women out there who would saddle the horses for us, cussing at the horses all the while. I never heard such language in our prim and proper household. Swearing was not allowed in our house, but swearing was allowed at Al’s! Oh boy! Was it ever! Once saddled up and ready to go I tried to copy how Artie neck reined with one hand holding the reins and one hand on his hip. The purpose for the ride was to look for deer sign in the timber because this was where my dad did his hunting. Eventually we’d go through a break in the trees, and the horses got the barn in their sights. They always took off while we clung to the saddle horn for dear life laughing our stupid heads off.
Winter
Winter was beasty cold and windy and most of the time there was very little snow. It seems like it just blew away in that fierce wind. The scene you saw out your window was monochromatic shades of white, gray, brown and black occasionally punctuated by the dark green of the evergreen trees. The fields were white. The trunks of the trees were black. The snow, if there was any, was dirty and unappealing. The sky was a horizon-to-horizon solid mass of depressing gray and it was almost always clouded over with low clouds that had no texture. Just a blanket of gray the same color as the ground. The only time the sky was clear would be after a cold front that came in from Canada and then it would be bitterly cold.
Sometimes there would be an ice storm which we kids loved. School would be closed because it was treacherous to drive or go anywhere. Everything was covered in ice. I mean everything. The tree branches and electric wires sagged down to the ground like they would snap any minute and sometimes they did. We got out our ice skates and would skate in the streets. There wasn’t anything not to like about it. When we got older and could drive, we would go to an ice-covered parking lot and slam on the brakes to spin doughnuts. Perhaps because of this I got really good at driving in bad weather, and it never scared me but maybe sometimes it should have. Ice storms were beautiful but dangerous.
In Al Polley’s timber we’d go for winter cook outs in the snow. Artie and his friends had built what they called The Deer Shack. It was an A frame plywood structure that they went in to get warm after sitting on a stand high up in a tree waiting for hours for a deer to come along. Deer season in Iowa was in November, so you know it was cold. Sitting up in the tree on a little board for your perch was the only way to get a deer if you could get one at all. They might have chosen high-powered rifles with scopes, but they didn’t. Just ordinary old-fashioned recurve bows with a heavy pull that you couldn’t hold for very long unless your arms were super strong. Not like the compound bows of today. You had to be really strong and steady to use a recurve bow. I guess they wanted the challenge and the sport.
In winter the guy who ran the grocery store and bakery down on Nevada Street scooped out a large shallow area in the empty lot next to his store and filled it with water after the weather was good and cold and the ground was frozen. The ice wasn’t smooth, so I never did well at skating. I fell more than anything else. Sometimes mom and dad would take us to the country club where they had acres of rolling hills with only a few trees and bushes and covered with snow but not so deep so a kid could get out their toboggan, inner tube or Flexible Flyer and go screaming down the hill careful to miss the tiny creek covered with snow at the bottom.
Sometimes we went to flooded and frozen areas out past the old power plant on North Center Street. There’s something about a cold winter day with the sun shining that makes life wonderful. The scent of the air fills your lungs, and all is right with the world no matter what turmoil you might be otherwise experiencing.
We played outside except in blizzards, of course, but as I got older even blizzards didn’t deter me. I just got bundled up and walked around pretending I was Omar Sharif, as Dr. Zhivago, looking for Tonya. Tonya! Tonya! I would mutter under my breath pretending to stumble through the drifts. I know, this is weird but that’s just me.
When our mothers bundled us up, we looked like Ralphie’s younger brother in “A Christmas Story” and this is one of the reasons that movie is beloved and played over and over. You can relate if you grew up in a climate with winter. We’d go out to build snow forts and lob snowballs at each other or dig snow caves into the drifts and pretend we were Eskimos. We made snow angels in the snow and rolled snow into snowmen and snow creatures. There’s was no end to things to do. We’d throw snowballs at the icicles hanging from the eaves to knock them down and then use them as erstwhile weapons or build little walls with them arranging them in a row. Sometimes we’d lick those dirty things like they were ice cream cones. They tasted like dirt but do little hellions care if something tastes like dirt? Being outside in all seasons was neither here nor there for us. We didn’t think about it. It was just what we did and what was expected of us.
An excerpt from “Just Walk Away – a memoir of growing up in the Midwest”
Mom and Artie had a habit. Every morning as we sat at the breakfast table they would be discussing our next meal.
Artie says, “What are we going to have for lunch?”
Then at lunch they would be invariably discussing dinner.
Mom says, “What do you want for dinner?”
Our lives seemed to revolve around food. Well, it just seemed that way. We did many other things and focused on lots of stuff that didn’t involve food. I guess. Maybe I’m wrong. Maybe I just wish everything didn’t revolve around food, but that it really did.
Food was nourishment but it was also satisfying. A well-made dish got special attention when it was especially good. We remembered these dishes and traded around recipes written on 3 x 5 index cards that would go in a little metal recipe box. It didn’t have to be only home cooked food. We also zeroed in on good restaurants and cafes anywhere we went and remembered where the good ones were so we could go again. Dad had his special Italian restaurants. He loved the Steak de Burgo that he got at Johnny and Kay’s in Des Moines for example. Steak de Burgo was a beef tenderloin pan seared and covered with a sauce of garlic, butter and Italian herbs. There wasn’t much to choose from in Marshalltown but what was there was good old-fashioned American food. I’m 100% positive that life wouldn’t have been as wonderful if it weren’t for the good food we enjoyed.
Let me get one thing straight: we weren’t gluttons. Only mom and my brother got fat. Mom got fat from having kids and not losing the baby weight. Rol got fat after he left home and went to work at the Watchtower in Brooklyn, New York. I guess they had cafeteria food there and he didn’t get very much exercise. Our food wasn’t what one might call health food but it was healthy enough and the vast majority of it was home cooked. Back then even restaurants cooked from scratch. There wasn’t the Sysco truck pulling up with pre-made foods. We also didn’t have fast food, and I doubt we would have eaten it very much if there was.
My first memory of food was from the apartment on North Street. Mom made homemade noodles from a simple recipe that she learned from my German grandmother. It was my first favorite thing to eat. It was simple because the only ingredients were flour, eggs, a pinch of salt and water. My mom piled the flour into a mound on the table, plopped the eggs in a shallow well she made in the center of the flour and then proceeded to mix it all with her hands gathering flour from the edges and incorporating the eggs into it gradually. I watched. It was pretty cool how she did it. When it was all mixed adequately, she would roll the dough out thin with a rolling pin, then roll up the flat sheet into a long tube. Then she cut through the dough to make long thin strips. To the strips she added more flour to keep them from sticking together and then she spread them out on the table to dry. She made chicken and noodles or just served them boiled plain with plenty of butter. The noodles were chewy and delicious and there was that delectable sauce. My dad called me The Noodle Kid because I would eat and eat the noodles Mom made. I was 3 or 4 years old.
We didn’t have Kraft Macaroni and Cheese or Pepperidge Farm Goldfish crackers. We didn’t have frozen pizza rolls from the dairy case either. They did not exist nor were there any kind of frozen pizzas so the only time a kid could have pizza was when their folks took them to the pizzeria. Our only nod to convenience foods were saltine crackers and canned Campbell’s soup, cold cuts from the butcher – usually bologna. The Fareway store had and has the best deli counter in the world outside of New York City and I loved to go in there and look at all the amazing cold cuts. Baked ham, roast beef, pickle and pimento loaf, chopped ham, mortadella, cotto salami, olive loaf and more. Mom loved liverwurst. I hated it.
Sometimes we would have cookies – usually sandwich style with icing in the middle like Oreos. Mom liked the almond windmill cookies, and we ate them dipped in milk. We ate a lot of peanut butter sandwiches and later some friend showed me how to spread the bread with butter then spread the peanut butter after that to keep the peanut butter from sticking to the roof of my mouth. In those days nothing, not even hydrogenated oils, had been added to the peanut butter. It was a disconcerting feeling to have the peanut butter stick to the roof of your mouth. Not necessarily easy to get it out. You had to work at it with your tongue. The butter did the trick, and I still use it even though peanut butter is made with a new-fangled recipe these days and doesn’t stick to the roof of your mouth. Some people are grossed out by this technique.
Once Artie got a live turkey as a Christmas gift from Lennox where he worked. He knew what to do with live game because he was a hunter and fisherman, so he took the turkey out to the back yard to slaughter it. Then, as I watched in horror, he chopped the head off the turkey with a hatchet and let go. The turkey flopped all over the place spewing blood. It was so gross. I guess he then defeathered and gutted it, but I had already beat a hasty retreat back to the house, so I missed that part. All I remember is the flopping. Artie was a hunter trained by his own father to hunt and fish so we had a lot of wild game on our table.
I developed a disgust for all the game that my dad hunted and killed, which my mom then cooked and served at our dinner table. It didn’t help that Artie would allow us to watch as he skinned and disemboweled the animals right before our very eyes. Ok, yes, this is the “natural” order of things, but nobody explained this to me or helped me overcome it. As a matter of fact, no one ever explained much of anything to us kids. I don’t know why. Maybe it just never occurred to them that anything needed to be explained. Adults came and went and did what they did how they wanted to do it. This was not shared with the children. We would just have to figure it out on our own.
I was especially repulsed by having to pick buck shot out of a squirrel or rabbit leg that lay on my plate. I’d take a bite and then refuse. Nobody forced me to eat it, which was quite humane of them and I’m glad they didn’t, otherwise I might have had an even worse eating disorder. I wonder what Artie thought about my refusal. His own dad, my grandfather, would have never accepted that kind of disobedience because they had grown up in the Great Depression and food was food and not always readily available. But Artie accepted it from us kids. However, Mom further encouraged my distaste of wild meats. When lake fish was served which was regularly because Artie was a great fisherman, she would harp, “Watch out for the bones. Watch out for the bones. You might choke on the bones.” This was her litany especially when we would go to the fish frys at the Isaac Walton League south of town where Artie kept up with his archery skills. At first, I thought I would like the crunchy fish deep fried and then the beans or cole slaw on the side. I can’t remember if they also had French fries but when Mom started in then all of sudden I was not interested in the fish. OK, thanks Mom, I’m done with the fish now. It took me years to realize that I wouldn’t choke, and then I could eat it even though I’ll always hear her voice chiming away in the back of my mind.
The majority of our food was home cooked from scratch. Mom never bought prepared boxed meals or sugary items at the grocery store, for example. I envied kids who had Sugar Pops or Frosted Flakes in their cupboards. If Mom did buy boxed cereal, it would be Wheaties or Wheat Chex. Oh, my god, mom! You are no fun at all! Mostly we had the hated old-fashioned library paste flavored oatmeal. (yes, I knew what library paste tasted like because I sampled some once and only once). To make it tolerable we added butter, heaps of brown sugar and a little milk. Tasty not pasty. Have I told you about the scrambled egg sandwich she would foist upon me as I was going out the door to catch the bus to school? I would take it because there was no way she would let me refuse it and then when I got out of sight of the house, I would throw it in the gutter or down the storm drain. I was bound and determined not to suffer the embarrassment of eating a sandwich on the way to school in front of all my friends!
We didn’t have desserts in our house except for the occasional grocery store brand Fastco ice cream that came in a square paper carton. It was most often vanilla, and it was terrible but at that time we didn’t know better and accepted it. Once in a while she would come home with Neapolitan ice cream, in the Fastco box, of course, which was strawberry, chocolate and vanilla in sections. It was good enough and we ate it. We had nothing to compare it to after all. No Haagen Daz. No Breyers.
Some lucky kids had fudgsicles in their freezers and, boy, did I envy those kids! Mom considered these items extravagant, so we never had any. The most daring thing mom got were the almond windmill cookies from Keebler. They were ginger flavored I guess and there were little bits of almonds in them. They were in the shape of, you guessed it, windmills. While we’re on the subject of cookies, once I came home from school and Mom was not home. I must have been 8 or 9. When I looked in the cupboard for a snack, I saw some boxed coconut cookies covered with chocolate and caramel. What is this? Why are these here? This is very strange and completely out of the ordinary! I was terrified to eat one, this is how rare it was. I thought, “Maybe they were put there by bad guys and they’re poisoned, and they want me to eat one, so I’ll die.” I closed the cupboard and walked away even though they looked incredibly good. Then I obsessed and obsessed about them but kept my composure. I kept going to the cupboard to check if they were still there. They were. Eventually Mom came home, and they turned out to be legit. They were Coconut Dream cookies, and a friend had given them to her. Such was a child’s experience in a home devoid of sweet treats.
Artie’s favorite pie was Lemon Meringue and when I got old enough to bake, he would ask me to make one for him. I made the crust from scratch with Crisco and the meringue with whipped egg whites and sugar, but the filling was some Jello thing in a box with a little yellow gel tab filled with yellow dye that you pricked with a needle and that colored the filling. Grrrr-oss! Other than that, I don’t remember any actual desserts until the hippie days and then my mom made a killer carrot cake that was to die for.
In hindsight, I am glad that we never had many sweets. I think that having very little sugar helped me have good teeth and not get overweight. As a matter of fact, unlike everyone I knew I absolutely loved going to the dentist. Dr. Warrington would come in the exam room, take one look in my mouth and exclaim, “You have such beautiful teeth!” I was a vain young child easily overcome by flattery, but it was true. My teeth were straight, and I didn’t have any cavities. I never had to endure the agony of braces like many of my friends. I even had the added advantage of having a little gap between my two front teeth that I could squirt water out of to annoy my friends at the swimming pool. Later on, the gap closed, and this was perfect because it helped my teeth to stay straight, I guess. Room to move, you see.
It’s not that we didn’t have our indulgences. Just down the street from 15th Avenue there was a small grocery store called Twin Foods with a bakery in the back. It was called Twin Foods because the proprietor thought that milk and bread went together, and they probably do. You went down the street to the corner of Fifteenth Avenue, then you would hang a louie on Nevada (Nuh-Vay-Duh not Nuh-Va-Duh. Remember this is Iowa!) In a couple of blocks, you would arrive. There we would buy frozen Snickers bars and Slo-Pokes in the summer. They also had the best white bread baked in their own ovens, golden crunchy crust and soft chewy white inside. One of my favorite snacks was two huge slices of that bread with as much Miracle Whip that I could get on it so it skooshed out of the sides when you pressed the bread slices together. Of course one had to lick off the skooshed out MW. Only Miracle Whip. Nothing else. Not mayonnaise. Not butter. Only Miracle Whip. People who are not from Iowa or the Midwest don’t understand the attraction of Miracle Whip. Everybody in the Midwest uses Miracle Whip and I’m pretty sure they still do. It was an ingredient in just about every recipe you can think of. Deviled eggs don’t taste right without it. Turkey sandwiches after Thanksgiving don’t taste right without it. Potato salad doesn’t taste right without it. Coleslaw doesn’t taste right without it. Waldorf salad doesn’t taste right without it. Macaroni salad doesn’t taste right without it. Hamburgers don’t taste right without it. I like mayonnaise now but when I was young it had to be Miracle Whip.
We also fried bologna to put in a sandwich and ate hot dogs raw and uncooked. My brother lived on Franco American spaghetti out of a can or Campbell’s tomato soup with half a package of saltines crushed in it. On Sunday mornings we had pancake eating contests while Artie flipped pancakes as fast as we could eat them. “Who wants another pancake?” he would yell out. “Me!” we would yell back. These were silver dollar sized pancakes mind you. Not the ginormous restaurant size. You could eat a lot of silver dollar sized pancakes.
On Sunday night Mom might make Swiss Steak cooked in the pressure cooker and serve it with mashed potatoes. She’d get a cheap cut of steak, dredge it in flour and then pound the dickens out of it with a meat mallet, so a lot of flour was mashed into it. Then she would chop carrots and onions and pour a can of chopped tomatoes on top of the meat in the pressure cooker. Then we watch in fascination and fear as the little bobble thing on top of the pressure cooker would let off steam. Would it explode, or wouldn’t it? We never knew if it would, but it never did.
When it was all done, we would pile a mountain of mashed potatoes on our plates and then put a big piece of tenderized meat on top and pour the gravy over the whole business. You could eat the meat with a fork it was so tender. No knife was needed. My lifelong enjoyment of liver and onions also began here. I don’t know how Mom made it, but it was never dry or chalky. Of course, we drowned it in ketchup. And, oh, the onions! You had to have a mound of pan-fried onions, slightly caramelized on the whole she-bang. Sometimes she made what she called Neapolitan macaroni which other people call American Goulash. This was cooked elbow macaroni in a sauce of cooked hamburger and canned tomatoes all mixed up. This, too, was good eatin’!
When we went out to eat, which was not often, we had some choices and one of the choices was a café near the Third Avenue bridge that had a bar in the front and a restaurant in the back. It was kind of seedy, but we didn’t care. Their signature dish was a dinner plate size pork fritter with French fries. The bun was this ridiculous looking tiny thing in the middle of the giant pork fritter which had a couple of dill pickle slices and a dollop of yellow mustard. The pork itself was pounded wafer thin, breaded and deep fried. Mostly breading and a little meat. You would eat your way to the bun and, boy, did we love it!
The other treat was the Maid Rite sandwich. Can I write an ode to the Maid Rite! You bet I can! When I was older and had come from California for a visit, we saw that Hilary Clinton was on the campaign trail and headed for Marshalltown. We dropped everything for a glimpse of the famous person and there she was with her big bus pulled up to the courthouse lawn. There, up on the stage, the first thing out of her mouth is, “I’ve been to Taylor’s Maid Rite! And I can tell you they’re made right!” brr-rump-chi! Yeah, right, Hilary, tell us something we don’t know. You could see all the Iowan eyes in the crowd rolling in their heads. After her speech I pushed through the crowd to shake her hand, and it was kind of a limp rag and soft. I guess I might get that way having to shake thousands of hands a day.
The Maid Rite was and still is a white hamburger bun piled high with ground sirloin cooked until it fell apart in crumbles. My sister Toni once made a very good and reasonable facsimile of a Maid-Rite but generally it is a secret recipe, and no one really knows exactly how they do it. Roseanne Barr, the comedian, called it “loose meats” and had a café in her TV series that served them. Loose meat is a terrible and stupid name for this delicious sandwich. Calling it that makes it sound perfectly revolting because it’s really perfection on a bun with pickle, chopped onion and yellow mustard. NO ketchup mind you. In classic Maid-Rite land this is not allowed. Ketchup had been pulled from the menu in the Great Depression because bums would come in, sit themselves down at the counter, order a cup of hot water then proceed to add a bunch of ketchup for a strange kind of soup. I’ve heard that ketchup is now on the menu but in those days, we did not want or need ketchup.
To go with your Maid Rite, you had to have one of their amazing, malted milk shakes. A spoon would stand straight up if you stuck one in. It was a heavenly taste, the Maid Rite along with a slurp of chocolate, strawberry or classic malt flavored milk. They did not serve French fries. It was perfection just those two things.
Sometimes on a hot and humid summer night dad would say, “Let’s go get ice cream.” And then we’d pile in the car to drive to a creamery in Tama (Tay-ma). We’d be driving in the dusky evening light along highway 30 and I’d look out the car window at the miles of corn fields with billions of lightning bugs flashing and wonder why there was so much corn. I didn’t eat that much corn. Why was there so much corn? I didn’t figure it out until much later that everything in the world is made from the miracle plant and also fed to cows to fatten them up. Corn starch, corn syrup, corn oil in various shapes and forms going into just about everything out there. Adhesives, cosmetics, batteries, textiles, and soap. You name it. If you find the modest little plant out in the wild that modern corn was developed from (teosinte) you wouldn’t believe how they could keep going through trial and error until they got modern corn. Modern corn bears almost no resemblance to ancient “corn”. The power of human persistence and ingenuity.
Sometimes we’d go to the Tastee Freeze south of town on highway 14 and get soft serve ice cream that was dipped upside down into chocolate and the chocolate would then harden. You’d eat a hole in the top of the chocolate and then suck the soft serve out while your tongue was trying to keep up with all the ice cream drips down the side of the cone. John Mellancamp immortalized the Tastee Freeze in one of his songs called “Jack and Diane”. “Suckin’ on a chili dog outside the Tastee Freeze.”
On the north side of town on highway 14 was the A&W root beer stand. The car hops would come out to your car and take your order and then come back with your food on a tray that attached to the side of the car. That root beer came straight from heaven. I kid you not. The mug had been in the freezer, and the sides of the mug were frosted over. Maybe there would be a hot dog alongside the root beer, but you didn’t really need it. The root beer was outstanding all by itself. No other root beer is as good. I tried making root beer once, but it didn’t taste anything like A&W. True old-fashioned root beer tasted very different from the recipe Mr. Allen and Mr. Wright developed, then broke the mold, and threw away the key in 1919.
Another summer excursion would be a trip to the outdoor drive-in to watch some cowboy movie and go to the concession stand and get a bag of their terrible salty popcorn which, of course, I loved. We’d park next to the speaker which was attached by a long wire cord to a pole. Mom would take the speaker off the holder and hook it over the door window. The sound was awful, all grainy and crackly, but that didn’t matter. It was all part of the drive-in experience. We’d watch until we fell asleep in the back of the car and then somehow arrive home and wake up in our own beds the next morning.
There was only one pizza place in town at the time. Luckily it was and still is the best pizza on the planet. It rivals any pizza you can think of including Chicago pizza, New York pizza, and wood fired pizza. None of them hold a candle to Zeno’s pizza. Am I prejudiced? Only a little bit. I think they use provolone instead of mozzarella or maybe a combination and it was the cheesiest greasiest saltiest pizza on a thin crust you ever had. The atmosphere was great. Everybody had their little booth, and the decor was kitchy Italian with fake grapes and flowers garlanded on the walls. It was a ritual to go to Zeno’s after every football game at Franklin Field. Sometimes it was a place to take a date. You could get spaghetti there, but it was the pizza that everybody loved.
At Shady Oaks restaurant east of town on Old Highway 30 (and if you didn’t know, this was the famous coast to coast Lincoln Highway built before interstate freeways), I would always have a giant wedge of iceberg lettuce with Roquefort cheese dressing poured all over. I thought it was quite special and unique that they brought those triple dispensers of salad dressing to the table with a choice of thousand island, Roquefort and Italian dressing. You could ladle out the dressing to your heart’s content, and this made me very happy. It wasn’t sanitary but that didn’t cross our minds. At home we didn’t have salads. We had vegetables.
I would be remiss if I didn’t mention Milt’s on S. 12th Avenue. This was a hamburger joint, but the attraction was Milt himself. We kids watched in amazement as he poured our milk into the glass going higher and higher until he was pouring it from what seemed like 3 feet above the glass. When Milt retired the restaurant became a Chinese restaurant and dad would say, “Let’s go get flied lice.” He thought this was funny and didn’t realize how derogatory it was to say it that way. The food was actually pretty good for standard Americanized Chinese food. They had Egg Fu Yung which was smothered in some kind of beefy gravy and pork fried rice as well as Chow Mein. I really liked the Egg Foo Yung and deep-fried egg rolls dipped in the red dye #5, I mean, sweet sour sauce. Oh yeah, and of course, the flied lice. Not your gourmet fare but we had never had anything gourmet, so we had nothing to compare it to.
Everybody in Marshalltown considered that Stone’s under the third street viaduct next to the old train station was the piéce de la resistance and gourmet meal for special occasions. It had to be Stone’s restaurant. My grandmother would ride the train from Illinois to visit us and we would meet her at the station. I particularly remember the gigantic locomotive bearing down on us in a threatening way and pulling into the station while making a hell of a racket. Then grandma would get off, and we would walk over to Stones for a quick bite. Stones was famous for their prime rib and traditional side dishes. It had an old timey feel about it, and well it should have because they had been in Marshalltown since the beginning. If you wanted to wine and dine your business associate or impress your date you took them to Stone’s.
Sometimes we would drive to Gladbrook to indulge in smorgasbord Iowa-style. “Smorgas” is “bread and butter” and “bord” is “table” in Swedish. Gladbrook was a half-hour drive north of town through the cornfields. Smorgasbord in Iowa was/is a Swedish buffet with Iowa favorites added. The Swedish part is pickled herring with sour cream and chives, and then there were cold sliced meats that you could make a sandwich out of, the most important being ham with mustard. Sliced cheese, pickled cucumbers and sliced bread or rolls with butter. Swedish meatballs, warm potato casserole. Beet salad in sour cream and stewed red cabbage. If you weren’t about to explode after eating all that stuff you might be able to get down something for dessert. Jello, brownies, apple pie, and rice pudding sprinkled with cinnamon.
Other times we would drive to the Amana Colonies of the Amish people who lived west of Iowa City and have a meal at one of their restaurants. We’d drive east on highway 30 and then veer off just past LeGrande on to road E66 and then drive east through the Chelsea bottomlands to Belle Paine and then Marengo. I thought this drive was particularly beautiful. I imagined how the native Americans might have lived here and enjoyed it. The Amana Colony restaurants were special because they served everything family style, which meant the side dishes were brought to your table in bowls and you served yourself whatever you wanted and however much you wanted. Not so sanitary but people back then had no knowledge of sanitary the way we think of it today. Pickled beets, sauerkraut, pickled ham, mashed potatoes, gravy, rolls and butter. Only your main course, which might be Wiener Schnitzel or fried chicken, was served individually on your plate.
An excerpt from my memoir entitled “Just Walk Away”
Let’s go back a little to when our family first came to Iowa. We had lived in Chicago for about a year and then we packed up and moved to Marshalltown, the county seat and the most populous town in central Iowa with about 20,000 people. Marshalltown was and still is a small Midwestern town with corn, alfalfa and soybeans fields all around it as far as the eye could see. My dad had gotten a good job as an art and marketing director at Lennox Industry headquarters which was in Marshalltown at the time. Those were the days when if you wanted a special image for your advertisement you had to have an artist paint an actual picture. Well before the days of computers, AI and digital drawing. So, my dad honed his painting skills while he worked. My mom took care of me and when my brother and sister came along, she held down the fort at home. Mom washed dishes, kept the house cleaned well enough, talked on the phone with her friends and kept us kids in lunches and halfway decent, clean clothes. We were smack dab in the middle of the middle class. We didn’t have luxuries, but we had food on the table, medical care, a car to drive, one bathroom to share, sidewalks to draw hopscotch on and for bike riding, a yard to play in in a housing subdivision of similar folks. But that housing subdivision house came later.
The first place we lived was a rented apartment on North Street. It was just me and mom and dad at first. My sister Antoinette Jean (whom we call Toni) was born a year and a half after me and my brother Raoul James (whom we called Rollie) was born two years after Toni. Oh yeah. Those god-awful names were another way we were different from everybody else. Mom said she gave us those names because, “I wanted to give you kids an appreciation of things French.” That’s exactly how she said it. So, did we get an appreciation of “things French”? I’ll say no effing way! What a pain in the butt those names were!
I got called Ree-Nee or Eye-Reen over and over again. My last name was even more difficult for the troglodytes (sorry, troglodytes, I guess I’m a snob). People said Ben-Noor or Ben-Nore in a half assed way trying to pronounce it correctly, but they didn’t have a clue. At least they tried so I’ll give them that. The phonetic pronunciation of Buh-Noit became the norm. What can you say? A rose by any other name would smell as sweet so it really was no big deal what we were called.
I had to move to California to overcome the bumpkins and when I did, I decided to uphold “cultural integrity” and pronounce my last name Ben-Wah the way it’s supposed to be pronounced in French. A part of me wanted to shove it back to all those people who mangled my name growing up and just give it to them in spades. I’ve never looked back, and I will defend my pronunciation until the end.
The streets in the North Street neighborhood were lined with towering elm trees, and their branches were like cathedral arches over the streets. This made it shady and more tolerable in the hot, humid summers. We listened to the cicadas in summer that buzzed in the trees all day droning their mantras, and we rode our trikes up and down the wide sidewalks pumping our little legs as fast as they would go. These were our “To Kill a Mockingbird” days. We even had a Boo Radley character in our neighborhood who would walk the streets stopping at street corners and peer around uselessly like he was lost. We called him The Crazy Farmer much the way the kids in Mockingbird might have spoken. He was dressed up in dirty old worn-out baggy overalls, and a wrinkled shirt. His arms hung down the sides of his body and his lower lip stuck out like a ledge. He was just as mysterious as Boo and also just as harmless.
Mom had a big old-fashioned pram, and she put us kids in it and pushed us fast for fun. I can still remember sitting inside on the mattress with the sides coming up high so I couldn’t see anywhere but straight up. I looked up at the trees streaming by while hanging on to the sides. When I was big enough, my little sister and brother got in it, and I pushed them myself.
When you look at the picture of the house at 101 W. North Street you see three windows on the diagonal. This was an interior stairway that went up to the second floor where our apartment was. The outside door went directly to the basement. Filtered through the tree’s leaves you can see the two windows above the sink in our kitchen, and at age 1 or 2 I sat in the sink to have a bath and looked out those two windows. I also remember that my folks had a tiny art studio on the third floor where that dormer is. If I went there again, would it be as I remember it, or would it be different? We played on the porch and when Grandma Frieda came to visit, she snored so loud she scared the ever-livin’ beejesus out of me. I thought there was a bear coming to eat us. I wasn’t even 5 years old yet.
Mom took us to play at the lush and beautifully landscaped Riverview Cemetery a few blocks north of our apartment. It had a decent-sized central lake with a fountain in the middle with big white swans sailing gracefully around. The swans on land were territorial and mean and would chase you to try to peck you if you got too close. So, we kids would taunt them, and they would charge at us all puffed up as we screamed and ran away. There were very big monuments and mausoleums in that cemetery as a tribute and memorial to who I don’t know. Probably the rich and famous of Marshall County. On the northern edge of the cemetery there was a bluff overlooking the Iowa river bottom and flood plain. Standing at the top of the bluff you could see down there, and I always wanted to explore but I never did. It looked like nasty, scary things lived there, and they probably did. Anyway, if you consider muskrats and beavers nasty and scary, then, yeah.
As we got a little bit older, one of our regular destinations was Mayer’s North Street Market, a half block away from our house. We could see it from our porch steps. I remember they had blue popsicles in the ice cream freezer, and they were my favorite. I think the flavor was raspberry. The Mayers were a kindly older couple who were like grandparents to us kids and they had no objection to us wandering up and down the aisles of the tiny store looking at all the items on the shelves.
Raymond Cartwright and ShariFern Judge were my playmates. Raymond, my mother told me, would come to our door and plead, “Cuh May cuh mout?” Remember, nobody in Iowa could pronounce my first or last name but he had an excuse because he was probably only four years old. I was Scout and he was my Dill.
As I said before, we kids had the run of the small vicinity around our house and in the summer, we’d troop over to Mayer’s and I would always get the blue popsicle. The blue stained your tongue. We’d go around sticking our tongues out to gross everybody out. Who knows what made it blue or if the blue was safe to eat? In those days people didn’t know what they know today. For example, mom cooked in an old fashioned aluminum skillet without a second thought. When we got older, we rolled mercury around in our hands as a toy and our folks sprayed snow-like asbestos and threw tinsel on the Christmas tree as a decoration. Almost every man smoked, of course, and a lot of women did, too – no one knew about secondhand smoke – and there was lead in paint, DDT for mosquito abatement, and no seat belts in cars. Every summer the mosquito abatement truck would drive around the neighborhood belching a giant cloud of some poisonous, noxious smoke from a sprayer in the back end. Nobody went outside to play in it, but nobody kept us locked inside with the windows sealed shut either.