I feel an affinity for New Orleans even though I have never been there. It’s the French in me, I guess. My dad and his wife Terri used to go there and get shrimp right off the shrimp boats. Maybe they met the original Bubba Gump. Maybe not. It remains that I like New Orleans and that’s good enough for me.
I’ve always wanted to try a Muffuletta sandwich. I’ve had Po’ Boys before. The Po Boy I had was an oyster Po Boy and it came from the venerable Spenger’s fish market and restaurant in Berkeley, California one fine summer/fall/winter/spring day. I say it this way because the weather in Berkeley is roughly the same all the time so it’s hard to differentiate between the seasons. Also, Spenger’s is no longer there, having closed years ago. Anyway, that Po Boy made me sick to my stomach. Maybe it was too greasy. The oysters, after all, are deep fried. This made me sad because I really wanted to love it and the first couple bites I did love. Much to my chagrin, I could not finish it.
I was hoping that my first muffuletta wouldn’t affect me in the same way and it didn’t, but I can’t really say that I loved it very much. It was too salty. The ingredients are all salty to begin with.
BUT…. If you love olives, this is the sando for you! It starts with a very easy to make olive salad.
Olive Salad Ingredients
¾ c pimento stuffed olives
3-4 small, pickled onions
¼ c pitted kalamata olives
4/4 c Italian giardiniera
2 large pepperoncini
2 T capers
1 medium clove garlic, chopped
1 t dried oregano
Ground pepper to taste (5-6 grinds of the pepper grinder should do it)
2 t lemon juice
2 T olive oil
Drain your ingredients and put everything in a food processor. Pulse until coarsely chopped. Won’t take but a minute.
Build your sando.
Halve a sesame seed Italian roll and scoop out the insides. Pile on mozzarella, provolone, salami and /or mortadella and capicola and the olive salad. Top with the other half of the roll and smoosh it all down. You can eat it immediately or wrap it tightly, refrigerate and eat later. Alternatively you can squash it under a brick. Ain’t that a kick? The olive salad keeps in the fridge in a jar.
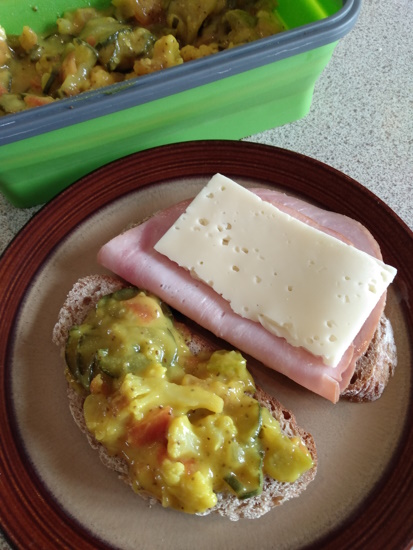
First Sandwich: Ham with Swiss cheese and Chow-Chow on Red Fife sourdough bread
Chow-chow (also known as Mustard Pickle)
This Joy of Cooking original first appeared in the 1931 edition and I’m sorry, but I couldn’t make this recipe as instructed because I would have wound up with way too much! The Joy recipe makes 10 pints! I also didn’t want to can it. I just want to try it so I only made enough that would keep in the fridge until I used it up. I made other modifications, too, out of necessity. I used salad cucumbers because I couldn’t find pickling cucumbers in the store, and I used a small amount of regular yellow onion because I couldn’t find fresh pearl onions. I had to use the greenest tomatoes I could find because I could not find flat out green tomatoes. Later on in this season I’ll have plenty but right now my tomato plants are still in their infancy. To reduce the volume, I used my “vast cooking experience” to figure out the proportions (ha ha) and it actually worked out pretty well. Chow chow tastes like Bread and Butter pickles (which I love).
This seems like a complicated recipe but it’s not. You prepare vegetables, a sauce and then you mix it all together. That’s really all there is to it. My version makes about 2 pints.
Cucumber Prep
Wash 2 thin unpeeled salad cucumbers well and remove a thin slice from each end then slice crosswise ¼ inch thick. (I scored them with a fork and then sliced them with a mandolin. I was hoping that the scoring would make the skin less tough, and it does)
Stir together 2 cups cold water and 2 T pickling salt until the salt is dissolved.
Pour the salty water over the cucumbers in a large bowl. Place something on the cucumbers to keep them submerged and refrigerate for a few hours.
Sauce
For the sauce, combine and stir until the sugar is dissolved:
1 cup cider vinegar
1 cup sugar
Whisk together in a medium bowl until smooth:
1 T all-purpose flour
1 T dry mustard
1 heaping t turmeric
1 heaping t celery seed
Slowly whisk about a 1/2 C vinegar/sugar mixture into the flour mixture. Whisk until smooth.
Bring the remaining vinegar/sugar mixture to a simmer in a large saucepan over low heat. Slowly whisk in the flour mixture. Do this a little at a time. I dipped my whisk into the flour/vinegar/sugar mixture. Cook, whisking constantly, until smooth and simmering. Don’t let it get too thick. Hold off before it thickens into a paste. Remove from heat, cover and reserve.
Remaining Vegetable Prep
Core or trim and dice:
1 firm green tomato (I couldn’t find green so I used the greenest tomato in the store.)
1 green bell pepper
You should have about a cup or so. Combine the tomatoes and bell pepper in a large saucepan with:
½ cup cauliflower cut into bite size pieces.
Blanch all of this for 1 minute in boiling water, peel, and then add to the vegetables:
¼ c pearl onions (If you can’t find pearl onions used about a T of regular yellow onion.
Drain the vegetables and then the cucumber thoroughly. Add the cucumbers to the vegetables and stir together well.
Mix
Stir the mustard sauce into the hot vegetables. Season with pickling salt to taste if it needs it.
Cool the mixture, pack into a jar, and refrigerate.
Second Sandwich: Ham with Cream Cheese and Apple Chutney on Red Fife sourdough bread
This apple chutney is so good I’ve been adding it to my curried cauliflower dinner or my sauteed kale dinner.
Apple Chutney
Wash the fruit (and peppers, if using).
Combine in a large saucepan:
1 peeled lemon, seeded and chopped.
1 garlic clove, chopped.
5 cups chopped peeled firm apples.
2-1/4 c packed brown sugar.
1-1/2 c raisins
¼ c chopped peeled fresh ginger
1-1/2 t canning salt
¼ t ground red pepper
2 c cider vinegar
(2 red bell peppers, chopped)
Simmer, stirring frequently for at least 2 hours or until sauce has thickened. Pack the hot chutney into hot pint jars leaving 1/ inch headspace. Process for 15 minutes. (or refrigerate and eat it up within a week of two. It goes well on just about anything!)
Next week: I’m making sourdough bread with Khorasan wheat flour.
You might remember the movie Julie and Julia where the main character decided to work her way through Mastering the Art of French Cooking making each and every recipe from the beginning of the book to the end. For me the movie was a mildly diverting bit of entertainment. I liked the parts played by Meryl Streep and Stanley Tucci as Paul and Julia Child and chuckled at Streep’s portrayal of Julia’s rough start at the Cordon Bleu.
I’ve toyed with the idea of doing the same thing but stopped myself because, honestly, Julia’s recipes aren’t a great fit for us in our household. Number 1 reason: Marty probably wouldn’t eat even half of the recipes. He’s a meat and potatoes guy and I’m not exaggerating. I mean, sincerely meat and potatoes and that’s it. His food color palette is white and brown with yellow as an accent. For example: a plain dry hamburger, nothing on it but meat and cheddar cheese – the yellow).
For fun I’m going to cook my way through whatever chapter of Joy of Cooking and whatever recipes in those chapters that appeal to me. I’m not as gung-ho as Julie. I get to choose what I want!
Chapter One: Sandwiches, Wraps, and Pizza
Two Roast Beef Sandwiches
Sandwich #1: Beef with romaine lettuce, sliced Beefsteak tomatoes, stone ground mustard and mayonnaise. The simple recipe: layer all ingredients on the bread of your choice. Add chips of any kind on the side.
I’m making these two sandwiches with my homemade no knead sourdough bread made with a heritage wheat known as Red Fife. It will be a combination of Red Fife and ordinary unbleached bread flour. Red Fife, to me, is a heavier grain as compared to, say Sonora white (which is a whole grain and not a refined product as the name implies) is lighter ,and produces a lighter finished bread. I’m glad I cut the red fife with white flour. It would have been very heavy if I hadn’t.
Red Fife no knead sourdough
3 cups flour (1-1/2 c red fife and 1-1/2 c unbleached bread flour)
1-1/4 t salt
¼ t active dry yeast
1-1/2 to 1-3/4 c cool water
Coarse cornmeal for dusting the pot.
A 3-quart cast iron pot with metal lid (enamel is ok. Must be sturdy.)
Combine all dry ingredients in a large mixing bowl. Mix thoroughly. Add 1-1/2 c water and stir. Add remaining water as needed until you have a thoroughly mixed, wet, sticky mass of dough. This dough will not be like any other bread. It will be much wetter and not form a ball. Cover bowl with wax paper or plastic wrap and let sit at room temperature for 12 to 18 hours. I’m not picky about how long I let it sit. I, for sure, let it sit the 12 hours but sometimes I let it sit for longer than 18.
After the hours have passed, your dough should be spotted with bubbles and more than doubled in size. It might have an alcohol smell to it but don’t mind that. It will burn off in baking. This is just a bit of sourdough fermentation.
Dust a clean surface with bread flour and using your fingers or scrapers scrape the dough loose from sides of bowl and turn onto surface in one piece. The dough will be loose and sticky. Don’t add any more flour. Just dust the top lightly with flour and cover with a clean cloth that doesn’t shed fiber. Linen or smooth cotton is good. Let dough rise another 1 – 2 hours.
About 30 minutes before the second rise is done, place a cast iron pot without the lid on the rack in the lower third of oven. I use a 3-quart Creuset enamel iron pot that has a metal knob. I replaced the wooden one with a metal one because the wooden one blackened and threatened to burn. Heat to 475 degrees.
Once oven has reached 475 degrees remove the pot using heavy duty potholders and sprinkle a teaspoon of cornmeal in the bottom. Uncover the dough and using scrapers or your hands shape the dough into kind of a ball and then lift carefully, plop the dough ball into the pot. Don’t worry about the shape. It will form itself.
Cover with the lid and bake for 30 minutes. After 30 minutes uncover and bake for an additional 15 minutes until loaf is brown but not burned. Remove from the pot by turning it over. It should come right out. Cool on a rack for a minimum of an hour. This is the hard part for Marty. He wants to cut into it right away and I’ve chastised him every time because if you cut into it while it’s still really hot it will not cut properly. It must lose some moisture. He hates this waiting part. Hot bread with butter is good so I sympathize but the cooling time completes the process. Look at it as an exercise in the delaying of gratification.
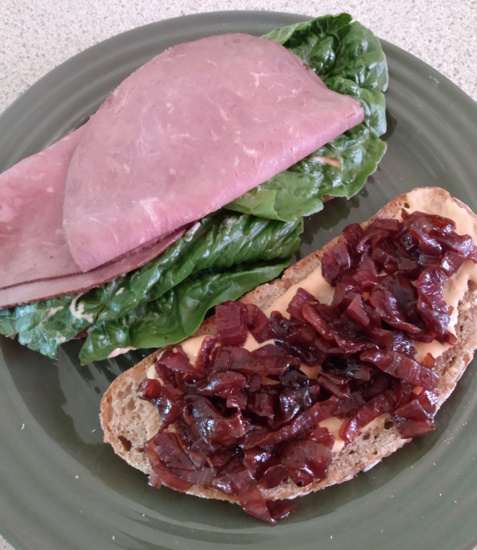
Sandwich #2: Beef with red onion marmalade and thousand island dressing – Layer roast beef on the bread of your choice slathered with onion marmalade and thousand island dressing.
Red Onion marmalade recipe
I really liked the idea of onion marmalade. My friend Lynn makes the most outstanding onion confit at Thanksgiving so this it right up that alley. But when I made this and tasted it I was not sure I was going to like it on a sandwich. It had a decidedly onion flavor and was a little bit sharp. Much to my delight and surprise the finished sandwich was outstanding so I was very happy. I wanted to eat two!
Combine in a medium non-reactive saucepan over low heat:
3-1/2 large red onions, halved and cut into ¼ inch thick slices
1/3 c dry red wine
1/3 c red wine vinegar
¼ c packed light brown sugar
¼ c mild honey
Cook, stirring until sugar is dissolved, then simmer, stirring often, the until consistency of marmalade, about 30 minutes.
Stir in
1 T orange juice
1 T lemon juice
Continue to cook, stirring, until juices are absorbed. Let cool. Cover and refrigerate for up to 3 weeks. Serve at room temperature.
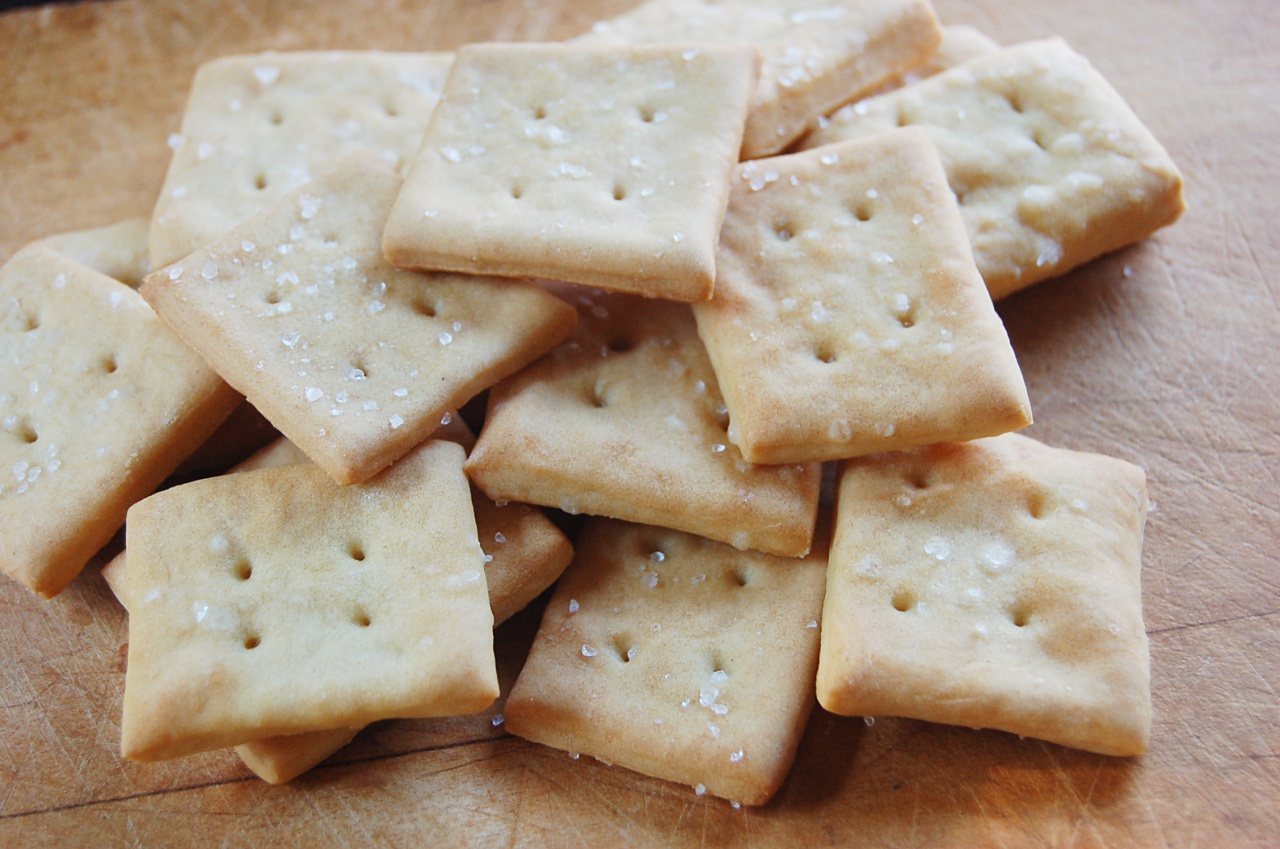
These soda crackers are about as easy to make as they can be and taste a whole lot better than store-bought.
When I was a kid back in the days of the dinosaur we ate soda crackers by the barrel full and they were always the Saltine brand. We would joke at my younger brother who would crumble crackers into his Campbell’s Tomato soup. “Rol!”, we’d say, “Are you having a little tomato soup with your crackers?” because he invariably crunched up a whole tube. I have to admit they made the soup taste a lot better. When my mom made homemade chili my dad would sit there with a package of saltines and as he ate he would swipe a bit of butter on the saltine and eat it with the chili.
Now, however, I’m a dyed-in-the-wool make it your-selfer so the other day when we had chili but no crackers I decided to make my own. How hard can it be I says to myself? Just so ya know I am not a cracker new-bie. I am an experienced cracker maker. But for some reason, that is lost to the ages, I have never made soda crackers. The crackers I made before were always whole meal and they always turned out all right if not a bit chewy and hard tack-like. This time I really wanted that soda cracker taste that you get when using white flour.
This recipe is from my mother’s well-worn 1950’s era Joy of Cooking cookbook. It was bequeathed to me when she passed away and it’s full of notes and almost, but not quite, falling apart. I’m taking care of it so I can pass it to my daughter.
Soda Crackers
About 100 crackers (ed. note: depending how thin you roll them out)
Combine in a medium bowl:
1-1/2 cups all-purpose flour
1 envelope (2-1/4 teaspoons) active dry yeast
1/4 teaspoon salt
1/4 teaspoon cream of tartar
Combine in a small bowl:
2/3 cup hot water
1/2 teaspoon honey
2 tablespoons vegetable shortening
Add the liquid to the dry ingredients and beat with a wooden spoon until smooth. If the dough is sticky, beat in a little more flour. Turn the dough out onto a lightly floured surface and knead until smooth and elastic, about 5 minutes. (Or mix and knead the dough in a heavy-duty stand mixer fitted with a dough hook. This is what I did.) Place the dough in a greased bowl and turn once to coat. Cover and refrigerate at least 1 hour, or overnight. (I let mine stand a couple hours.) Preheat oven to 425 degrees F. Grease 2 large baking sheets. (I used parchment paper.) On a lightly floured surface, roll the dough into an approximate 18 x 6 inch rectangle. Fold into thirds, as if you were folding a business letter, and roll out again into a rectangle of the same size. Cut into squares or shapes. (I used a floured pizza cutter wheel.) Prick your little cracker shapes all over with a fork, and transfer to the baking sheets. Put them close together but not touching. Sprinkle with salt (or poppy, sesame seeds, caraway seeds or a combination of all.) Bake until crisp and lightly browned around the edges, 10 to 20 minutes, depending on the thickness of the dough. Cool on wire racks.
Ed Note: I did have some leftover but they weren’t as good the next day. They must have absorbed a little moisture because they weren’t crisp anymore. Maybe a couple minutes in a hot oven would have crisped them up again.
(Image is from New England Today Food. We ate all our crackers before I even thought of taking a picture.)
Me and Grogu. I feel like I’m just getting started, like Grogu and I’ve got powers, but they’re not fully developed. Ever feel like that? Yeah, I can now say I’m 72 years old. As of today, October 13th. That seems like a lot of numbers but compared to, say, a Galapagos tortoise I’m still a baby. Maybe middle aged, at least.
Yet, I don’t feel like a baby and I guess that’s a good thing. Hmmm, maybe not. Let me think about that. OK. I thought and I’ve decided that the jury’s still out so I’ll get back to you on that. In the meantime I’m trying to ring out every last drop of life that I can while I still have the chance. It’s not so easy because the hum drum of life demands attention, so we have an uneasy truce. Ok, I’ll do errands or the rehab project for you and then can we go to explore the planet? Fair trade?
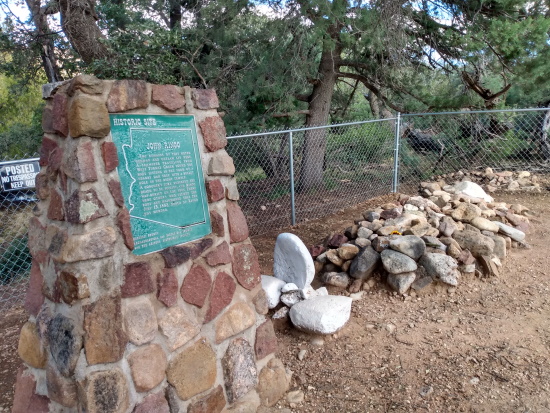
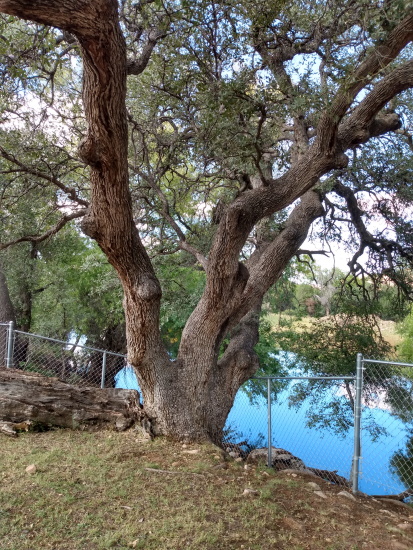
Yesterday we explored and happened upon a rare treasure. We drove over to the Chiricahua Mountains to see where Johnny Ringo, the famous outlaw from Tombstone days, was buried. The legend has it that he, aged 32, went up on Turkey Creek, sat down under an old oak tree, put a Colt .45 to his temple and pulled the trigger. Nobody knows exactly why he did it but there was scuttlebutt that he had threatened suicide many times before he actually did it. People lots younger have ended their lives so it seems plausible. He was seated in the crotch of the old Oak tree, and he couldn’t have picked a prettier spot.
The grave of John Peters Ringo aka Johnny Ringo the real life outlaw who terrorized the area around Tombstone.The tree where a freight hauler found him in 1882 with a bullet hole in his dang head. It’s an old tree and that’s a limb on the left that fell off.
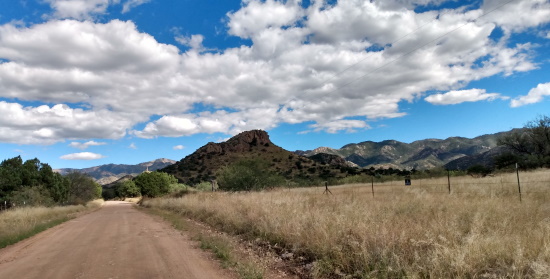
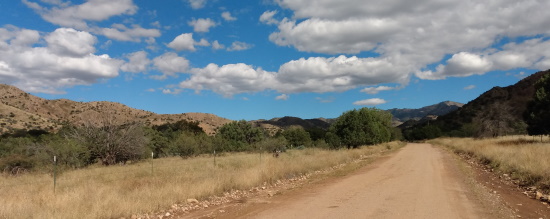
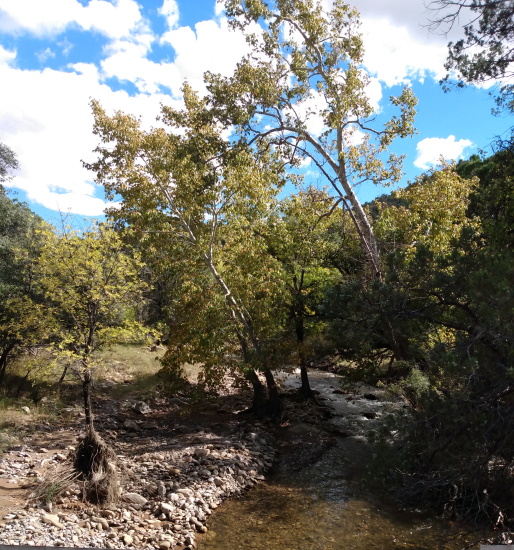
After we paid our respects, we decided to drive farther up Turkey Creek Road. It was a pretty good gravel road, which is rare in Arizona when you get off the pavement, and as we proceeded it was looking more and more like California terrain. Deer bounded out in front of us, and we crossed four one lane bridges. Turkey Creek was flowing full of water coming from who knows where in this arid land. I must admit I do miss many things about California, so it was nice to see how the area resembled California so much.
Looks very much like California to me.
Look closely and you’ll see a deer smack dab in the middle on the fence line. You’ll see its ears first.
Turkey Creek is full of water which is weird in this dry landscape. There must be springs farther up.
*******
Today Marty is giving me a nice little present of not having to cook! I cook 2 meals every day. We don’t cook breakfast. That’s cereal or coffee or toast. But for lunch and dinner, I get tired of same old same old or having to come up with a new dish. Getting a break on my birthday is a nice present.
What does a birthday mean? I think it means almost nothing. It’s just the march of time as measured on a calendar, and does it seem to you that time is speeding up as we get older? There’s the old saying, “Once you get over-the-hill to the other side, you speed up”. This seems very true to me.
So, as they said in Lord of the Rings, (and I paraphrase) it only matters what you do with the time you are given.
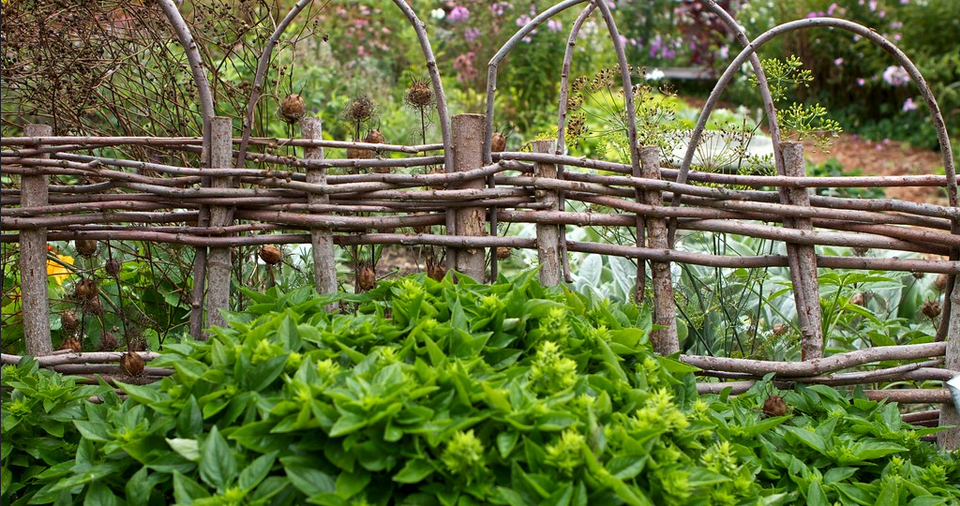
This isn’t one of my gardens in Iowa. I never took pictures, unfortunately, but this could well have been mine.
I don’t know why but ever since I left Iowa in 1977 and tried to have a garden I’ve encountered one obstacle to success after the other. Could it be that Iowa is special and I am ignorant? Yes, and yes. It’s true that even though much of that luscious Ice Age topsoil has eroded down to the Gulf of Mexico it’s also true that there is plenty left and it makes it almost a given that you will have success gardening in Iowa. When you’ve had it easy like I did growing up and you go somewhere else where that soil isn’t like that you’re in for a big shock. I got a shock. A big ole shock!
Where I lived in Berkeley developers had graded off what little topsoil there was and all I had to work with was hardpan. At Grindstone Ranch the soil was akin to pulverized rock. Water did not percolate into it. Just ran off. In the Central Valley there was that all too familiar hardpan under the sandy clay loam. But the Central Valley soil makes Arizona soil look sumptuous.
If a person – not me – had their thinking cap on they would take one look at Arizona and think “not the garden state of the Southwest”. Except for a relatively small area in Southwest Arizona near the Colorado River. They have thousands of acres of truck farms there. Lettuce, broccoli, brussels sprouts, celery. All growing in the gorgeous effluvium of that redoubtable river. But I don’t live there, nor would I want to, because even though the climate is great in the winter it’s unbearably hot in the summer.
So, it was with great consternation that I found, having done a soil test, that my garden soil was depleted. Zip, zero, nada, bupkis, for nitrogen, potassium, potash. On top of that major alkalinity and high pH. Not good. Not good. A major boulder appears in the road.
This is what I saw for my gardening future when I realized that my soil was completely kaput!
But being the person I am, I am forging ahead just like I did in Berkeley and Madera. I should be used to this, right? And there are ways to fix it even though I’m irritated as heck that I have to. When you get lemons, you make lemonade. No matter that the lemonade will not be served this season. Maybe it might not even come until next season. But, and this is for sure, it will come!
COMPOST… in a word the solution to all soil problems. As I’ve said my long-term goal is no chemicals whatsoever, all organic and eventually no-till. Long before I get to planting I need my soil to thrive because it’s truly the only way to save the planet and make healthy plants that resist insects and disease. The documentary “Kiss the Ground” doesn’t tell you the details of how to do it, but it gives you as taste of what is possible.
So I ask myself, what is good soil? The answer is that there is no one-size-fits-all answer when it comes to soil. It depends upon the preference of the plant. If you learn how a species grows in nature, and then mimic those conditions, you will find success. A saguaro cactus grows wild in the Sonoran Desert where soils are sandy, lack organic matter, and do not hold moisture between scarce rain storms. On the other hand, a lush fern that grows wild in moist, cool forests with ample shade and rich soil would do very poorly where the saguaro cactus flourishes. Arizona native plants are adapted and designed to thrive in this soil and in the hot, arid conditions.
In my backyard I have Sonoran Desert soil, so the easiest plants to grow are those that are native to the area. This is what I’m doing – to a point. In my previous article I told about how I was going to plant things like amaranth, Navajo corn and tepary beans. They are plants that the native Americans in this area figured out how to grow.
So here are the high points for how I’m tackling my problem: (These are things my dad never had to think about when he grew his 1 acre garden behind our house in Marshalltown.)
Aeration is key: I’m making sure the soil drains well and is not saturated. I’m incorporating 50/50 existing soil and well-aged organic matter.
Then I’m going to insulate and cover the soil with mulch because this conserves water. By creating a barrier, mulch reduces evaporation from the soil and lowers water usage. It also insulates from extreme temperatures during both the winter and the summer. Did you know it can be 10 to 30 degrees cooler beneath a layer of organic mulch such as wood chips or compost? Furthermore, as organic mulch breaks down over time, it adds nutrients back into the soil.
Then I’m going to build up organic matter. Perhaps the biggest difference between desert soils and those of other parts of the U.S. is organic matter. There is a lot of rganic matter in the soils of Iowa if you don’t know. Rocks were pulverized by the momentum of the glaciers and then vegetation decomposed in the temperate climate. While most soils contain up to 10 percent organic matter, desert soils contain less than 1 percent! Yikes!
Lastly, microbes are my friend. They are the mediators of nutrient uptake and are critical to growing healthy plants and food. Pesticides, herbicides, and petroleum-based fertilizers can be detrimental to microbial life, disrupting the symbiotic relationship between soil and plants.
Wish me luck my friends. At this time I am feeling hopeful. I caught the problem before the baby plants and seeds went in the ground.
I think they say this usually in the context of applying liberal amounts of agua. But I am not making the desert bloom doing that. I’m applying just enough water and then doing a lot of other things to make liberal amounts of water unnecessary.
When we bought this place the garden looked like this:
It was in April after a unusually dry summer and winter. Looks pretty bad, doesn’t it? You need imagination to see potential.
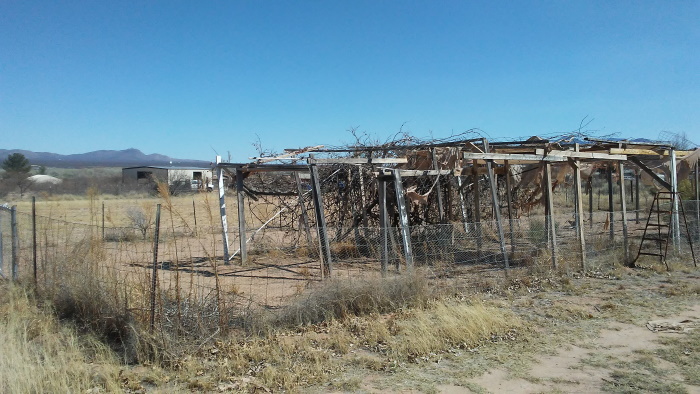
Whoever lived here before had put up chicken wire fencing, a gate, a rickety two by four shade structure and the shade cloth covering it had deteriorated in the sun giving it a Pirates of the Caribbean look. The grape arbor had grown completely out of control.
I’m improving this to make it a flourishing vegetable and flower garden. I’m trying to work with the environment as best I can so I’m growing vegetables and flowers that are adapted to this high desert climate (for the most part). My indigenous crops are going to be Santo Domingo melon, Mayo watermelon, Mexican amaranth, Blue speckled tepary beans, Navajo copper popcorn, and Anasazi sweet corn. Crops that aren’t indigenous but are desert adapted are the Windsor fava beans, Armenian cucumbers, Red Russian kale, broccoli raab, and Parris Island cos lettuce. My flowers are a mix of Southwest natives: Desert bluebells and marigold, lupine, fire wheel, penstemon, Desert senna, Globe gilia, Mexican hat and more.
All that black stuff is the tons of compost I’m incorporating to enhance the sandy soil. My long-term goal is to farm using no-till methods but first I need to get the soil to where it will be receptive to that. Shouldn’t take too long. I hope. The soil will tell me when it’s ready.
Lucky looks on wondering if he’ll get to eat any of it when it grows.My gardens never look like Martha Stewart’s but what I grow tastes good just the same!
When and if we get the monsoon rains, I will be utilizing the ak-chin method that the Tohono O’odham peoples have used for millennia. That is to say, I will be creating shallow ditches to funnel the rain where it needs to go. The worked-in compost will help the soil hold moisture. In addition to that I will use mulch spread on top, both sheet and straw.
To counter the “pests” (I know, pests have to eat, too, but….) I am reinforcing the fence, making below-ground caging, and companion planting. We had a lot of rabbits when we moved in, but I haven’t seen many for a long time now. However, I saw rabbit pellets the other day so I know they’re out there. The good fencing should keep Peter out! I have one short row of straw bales to raise the tasty roots away from the gophers and homemade hardware cloth cages will deter the gophers from eating the other plants.
Top photo: Upright cage secured with zip ties. Bottom photo: The cage bottom is kinda hard to see but ya gotta cover that, too.
Mint planted next to the brassicas with deter flea beetles and make great mojitos later on. Thyme around the bean plants will deter black flies. French marigolds near the tomatoes will deter white flies. You get the idea. It’s a multi-pronged approach!
The more alert of you will now be getting exhausted reading about all my preparations. This leads me to the last comment I want to make:
Gardening is fun. Once the garden is established.
By and large I would say that projects are the most fun in the beginning. You know, the newness of it. The excitement of trying something new. In gardening this is not true. I want my garden to flourish and not be overrun by insects, rabbits, and gophers. The soil has to be right. If I neglect the soil, it just spells trouble later on. Good soil grows strong plants that resist disease. All this preparation and planning needs to be done up front. Yeah, you can go ahead and throw seeds on the ground and hope something grows but chances are it won’t very well and even that small amount of effort will be wasted. No, gardening is not fun in the beginning if you’re doing it right and this is the phase that I am in right now. The laborious, not fun phase. But it will be worth it. And I can see it all now.
Why do I do this? I’m long in the tooth and not getting any younger! As a matter of fact, I’m now four months into my seventy second year on this wonderful planet and what do I do? Do I sit down and relax? Oh, no! Here we are in Arizona on our third ranch project. Somedays I wonder if I’m completely nuts. Other days I realize that to relax and sit on the porch gazing at the scenery… well, that’s just not me. I’m the one-foot-moving-one-eye-open gal! I cannot sit still!
Okay, I will admit one thing. I might still be moving but I’m moving a little slower. I’ve earned it. I might still be under the command of the Can’t Sit Still Club but the club is letting me ease off a bit.
We’re thinking ten more years and THEN we can sell off and move to a Hawaiian lanai and really do some serious porch sitting. My inner voice says Yeah Right! So, we’ll see.
Short and Sweet
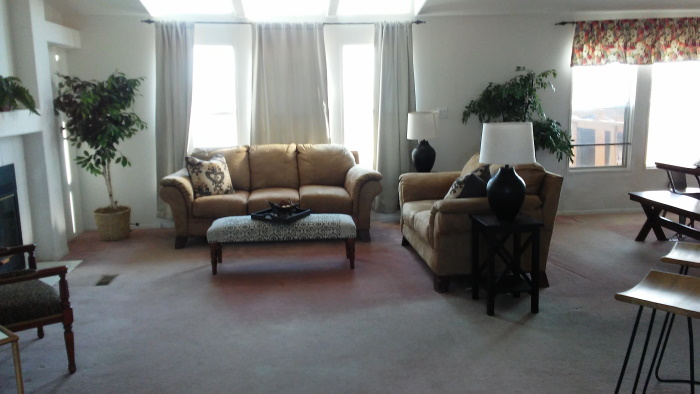
So, when we got here ten months ago, we bought a somewhat run-down manufactured home on four acres. Half of acreage was cleared. The other half was solidly socked in with mesquite and white thorn acacia. At least it was all fenced even if half the fencing was not visible. The interior of the home was pretty nice, open and spacious. It needed painting so wall by wall I painted it. The carpet was, and is, a spotted, stained disaster like a tenement slum. At least it wasn’t stinky. We’re letting that be for the time being as we constantly track dirt and thorns in and out. Leaving it means I don’t stress over making it dirtier. Someday when the outdoors is under control then we’ll replace it.
This isn’t our furniture but how it was staged when we first saw the house. Our furniture looks pretty much the same in size and layout.
We increased the tile area in front of the fireplace so we could set firewood down on something sturdy and have a larger fireproof area for popping embers. But besides paint, and replacement of worn out ceiling fans and windows in the 2 bathrooms that’s about all we need to do to the inside.
I have blue sky designs for a Japanese soaking tub in the master bathroom and pie in the sky dreams to replace the windows throughout because the windows are crap.
Once we finally got the backhoe here from California Marty was able to (pretty much but not 100%) clear out the rest of the acreage. Mesquite, yucca and white thorn acacia are tenacious! For example, you scrape off badly placed yucca and it just grows back! Marty has to dig down 3 feet and nearly break the back hoe to get the mother yucca root out of the ground! Now I know why the Native Americans had an endless supply of yucca shampoo. You can’t get rid of the stuff! Well, you can but you have to have pretty damn big equipment to do it!
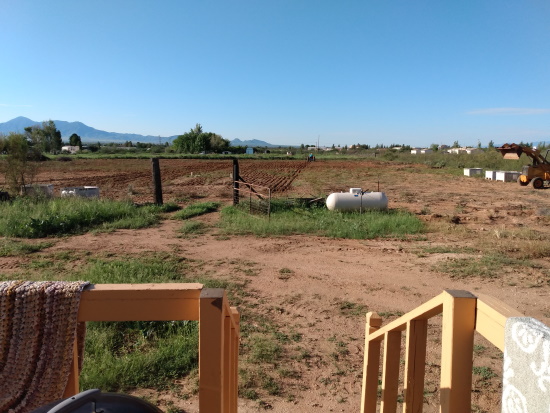
The deck is now big and not baby poop yellow. There’s going to be a fence around the back yard and the crappy gate and fence are going to be gone pretty soon. There’s going to be a big round pen on the right, a tack room next to a riding arena and horse pens in the middle.
I’m working on the garden area to improve it. I’m taking out the ginormous ramshackle shade structure that the previous owners cobbled together with 2x4s, wire and what-have-you. I’m building a real grape arbor California style and am hoping that my severe pruning hasn’t shocked the life out of the ancient uncared for grape vines. Somehow, I think not. I think that in the spring the ancient vines will come back even better than before. They were allowed to vine all over the place and weren’t putting out many grape clusters last year. Then I’m going to plant a big kitchen garden and sell my leftover produce at the farmer’s market. Since the garden area is big (40’ x 80’) I’m going to put my chicken run and henhouse in there, too.
What a mess! Grape vines are now pruned back and half the ramshackle arbor is gone. Future site of kitchen garden and henhouse.
I also trimmed up the giant Arizona cypress that had been planted too close to north side of the house. Let the Sun shine, let the sunshine in, the Sun shine in! I did the same with two mulberries on the east side of the house. Now they all look like real trees instead of overgrown gigantic bushes.
Marty is going gung-ho on building horse pens, tack barn, riding arena and custom round pen with slanted sides. Slanted sides eliminate the accidental toe catching on the sides that is nerve racking on straight side pipe corral round pen fences. Makes for happier and safer horse training.
He also increased the size of the back porch so it’s actually a place a person can grill on the Weber and not feel crowded.
We’ve planted 20 trees so far: 16 eldarica pines, 2 Chinese elms, and 2 Arizona cypress. We’ve also planted evergreen salvia in front of both porches. We’re going to fence in the back yard and build a traditional ramada out there for backyard bbqs.
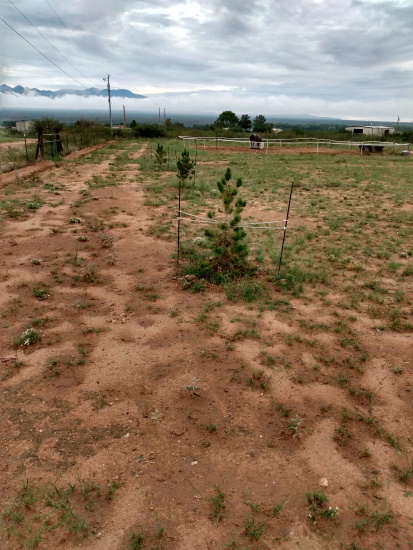
That’s Blue’s temporary horse pen beyond three of the 20 trees we’ve planted.
Listen with the night falling we are saying thank you we are stopping on the bridges to bow from the railings we are running out of the glass rooms with our mouths full of food to look at the sky and say thank you we are standing by the water thanking it standing by the windows looking out in our directions
back from a series of hospitals back from a mugging after funerals we are saying thank you after the news of the dead whether or not we knew them we are saying thank you
over telephones we are saying thank you in doorways and in the backs of cars and in elevators remembering wars and the police at the door and the beatings on stairs we are saying thank you in the banks we are saying thank you in the faces of the officials and the rich and of all who will never change we go on saying thank you thank you
with the animals dying around us taking our feelings we are saying thank you with the forests falling faster than the minutes of our lives we are saying thank you with the words going out like cells of a brain with the cities growing over us we are saying thank you faster and faster with nobody listening we are saying thank you thank you we are saying and waving dark though it is.
This recipe isn’t quick and easy but it’s definitely worth it!! I have been told time and again that I need to make these commercially and that people would drive miles for them and pay almost anything but I’m too lazy. If you want to go ahead and make these to sell, be my guest but know I will be demanding royalties… not!
Makes 8 big buns or 16 small buns or whatever fits in your pan
You have to make the dough first. The dough is the hardest part but is integral to what makes these so good. Sort of like when you make a pie. To be the best pie it has to have the best crust. I’ve had many a cinnamon or pecan roll and if the bun part is not good I spit it out. Too bad for the baker. Sorry. It has to be good dough and that’s the end of it. I have tried store bought Pillsbury dough and other recipes and all failed the Renée Taste Test. This bun recipe is the piéce de résistance.
Oh, you should be aware that this whole process will take a few hours so you might consider starting in the morning so you can bake your sticky buns that night.
Beautiful dough for the buns
¼ c warm water (feels warm – not hot – to touch)
1 pkg (2-1/4 t) active dry yeast
Combine these 2 things in a large bowl (or in a bowl of a stand mixer) and let the yeast dissolve. About 5 minutes.
Add to the dissolved yeast:
½ c all-purpose or bread flour
1/3 c sugar
¼ c milk
1 t vanilla
1 t salt
Mix this by hand (or on slow in the stand mixer) until blended. (I’ve done this by hand but after Marty gave me a stand mixer for Christmas I really would rather use it than do it by hand. I’ve been spoiled.) Once that is mixed, gradually add in 2 to 2-1/4 c all-purpose or bread flour stirring all the while. Mix until the dough comes together. Now dump it all out on to a lightly floured board or smooth counter and knead by hand (you know how to knead bread dough, right?) for about 10 minutes (or if you have a dough hook on the stand mixer knead with that on low for about 7-8 minutes). We want the dough to be smooth and elastic so it’s not sticking to your hands or the bowl.
Add 6 T (3/4 stick) butter, very soft, not melted just soft
and vigorously knead it in. It will be messy but keep working and it will blend. Trust me. I’ve done this many times. It will work. Endeavor to persevere. Knead until completely incorporated and smooth and elastic again.
Now place the dough in a large lightly buttered bowl. Cover and let rise in a warm place (like 75 – 85 degrees) until doubled in volume, about 1-1/2 hrs. May take shorter or longer depending on how lively your yeast is.
Now punch down and knead briefly. Just a few times. Then refrigerate, covered, until doubled again. 4 – 12 hrs.
The hard but important part is over!
Finishing. Going for the Gold.
Butter a 13 x 9 inch baking pan. Or iron skillet, whatever you have, pie plate, doesn’t really matter. Just something not too big or small that you can bake in.
Mix together in a small saucepan:
1 c dark brown sugar
½ c (1 stick) butter
¼ c honey
Bring this to a soft boil over medium heat stirring to dissolve sugar.
Remove from heat and mix in 2-1/2 cups chopped pecans.
Pour this lovely hot mess into the buttered pan, spreading evenly. While you’re letting that cool a bit roll the dough out to a rectangle shape approximately 16 x 12 inches and about a ¼ to 1/2 inch thick. This is all approximate. It can be thicker but generally since you want it to roll up in a robust spiral you’ll want it thinner rather than thicker.
Brush that flattened part with 1 T melted butter.
(You realize, at this point, we’re far beyond healthy and low calorie. Who cares?)
Sprinkle evenly with 1/3 to ½ c packed dark brown sugar and 2 t cinnamon
Roll it up into a cylinder from long side. Cut crosswise into however many rolls you want. Obviously cut thin you get more rolls but thinner rolls. Arrange the rolls cut side down in the pan spacing evenly. They can touch or not touch. Not touching is better so they cook more evenly. They’ll definitely puff up in the oven. But first cover once again and let rise at room temp until doubled. About an hour.
Meanwhile, preheat the oven to 350.
When the oven is preheated and the rolls puffed up, put them in the oven and bake until top is golden brown and the syrup is bubbling. By the way you might want to put a cookie sheet under the pan in case of any boil overs. Spare the oven.
Anyway, bake for about 30 minutes and keep an eye on them so they don’t burn. Remove from oven and let them cool about 5 minutes. Now you have to flip the whole business over on to the serving plate. To do this place a plate or serving platter over the pan and grasping both sides of the plate and pan (oven mitts help here) flip the whole business over so the buns come out.
Step back and feast your eyes. Not too long though because it’s now time to feast your mouth. Try not to eat too many at once. Try to save some for later.








 R L Benoit - Writer/Artist